Additional Burp best practices and tips #
Searching for a specific string in all of Burp Suite #
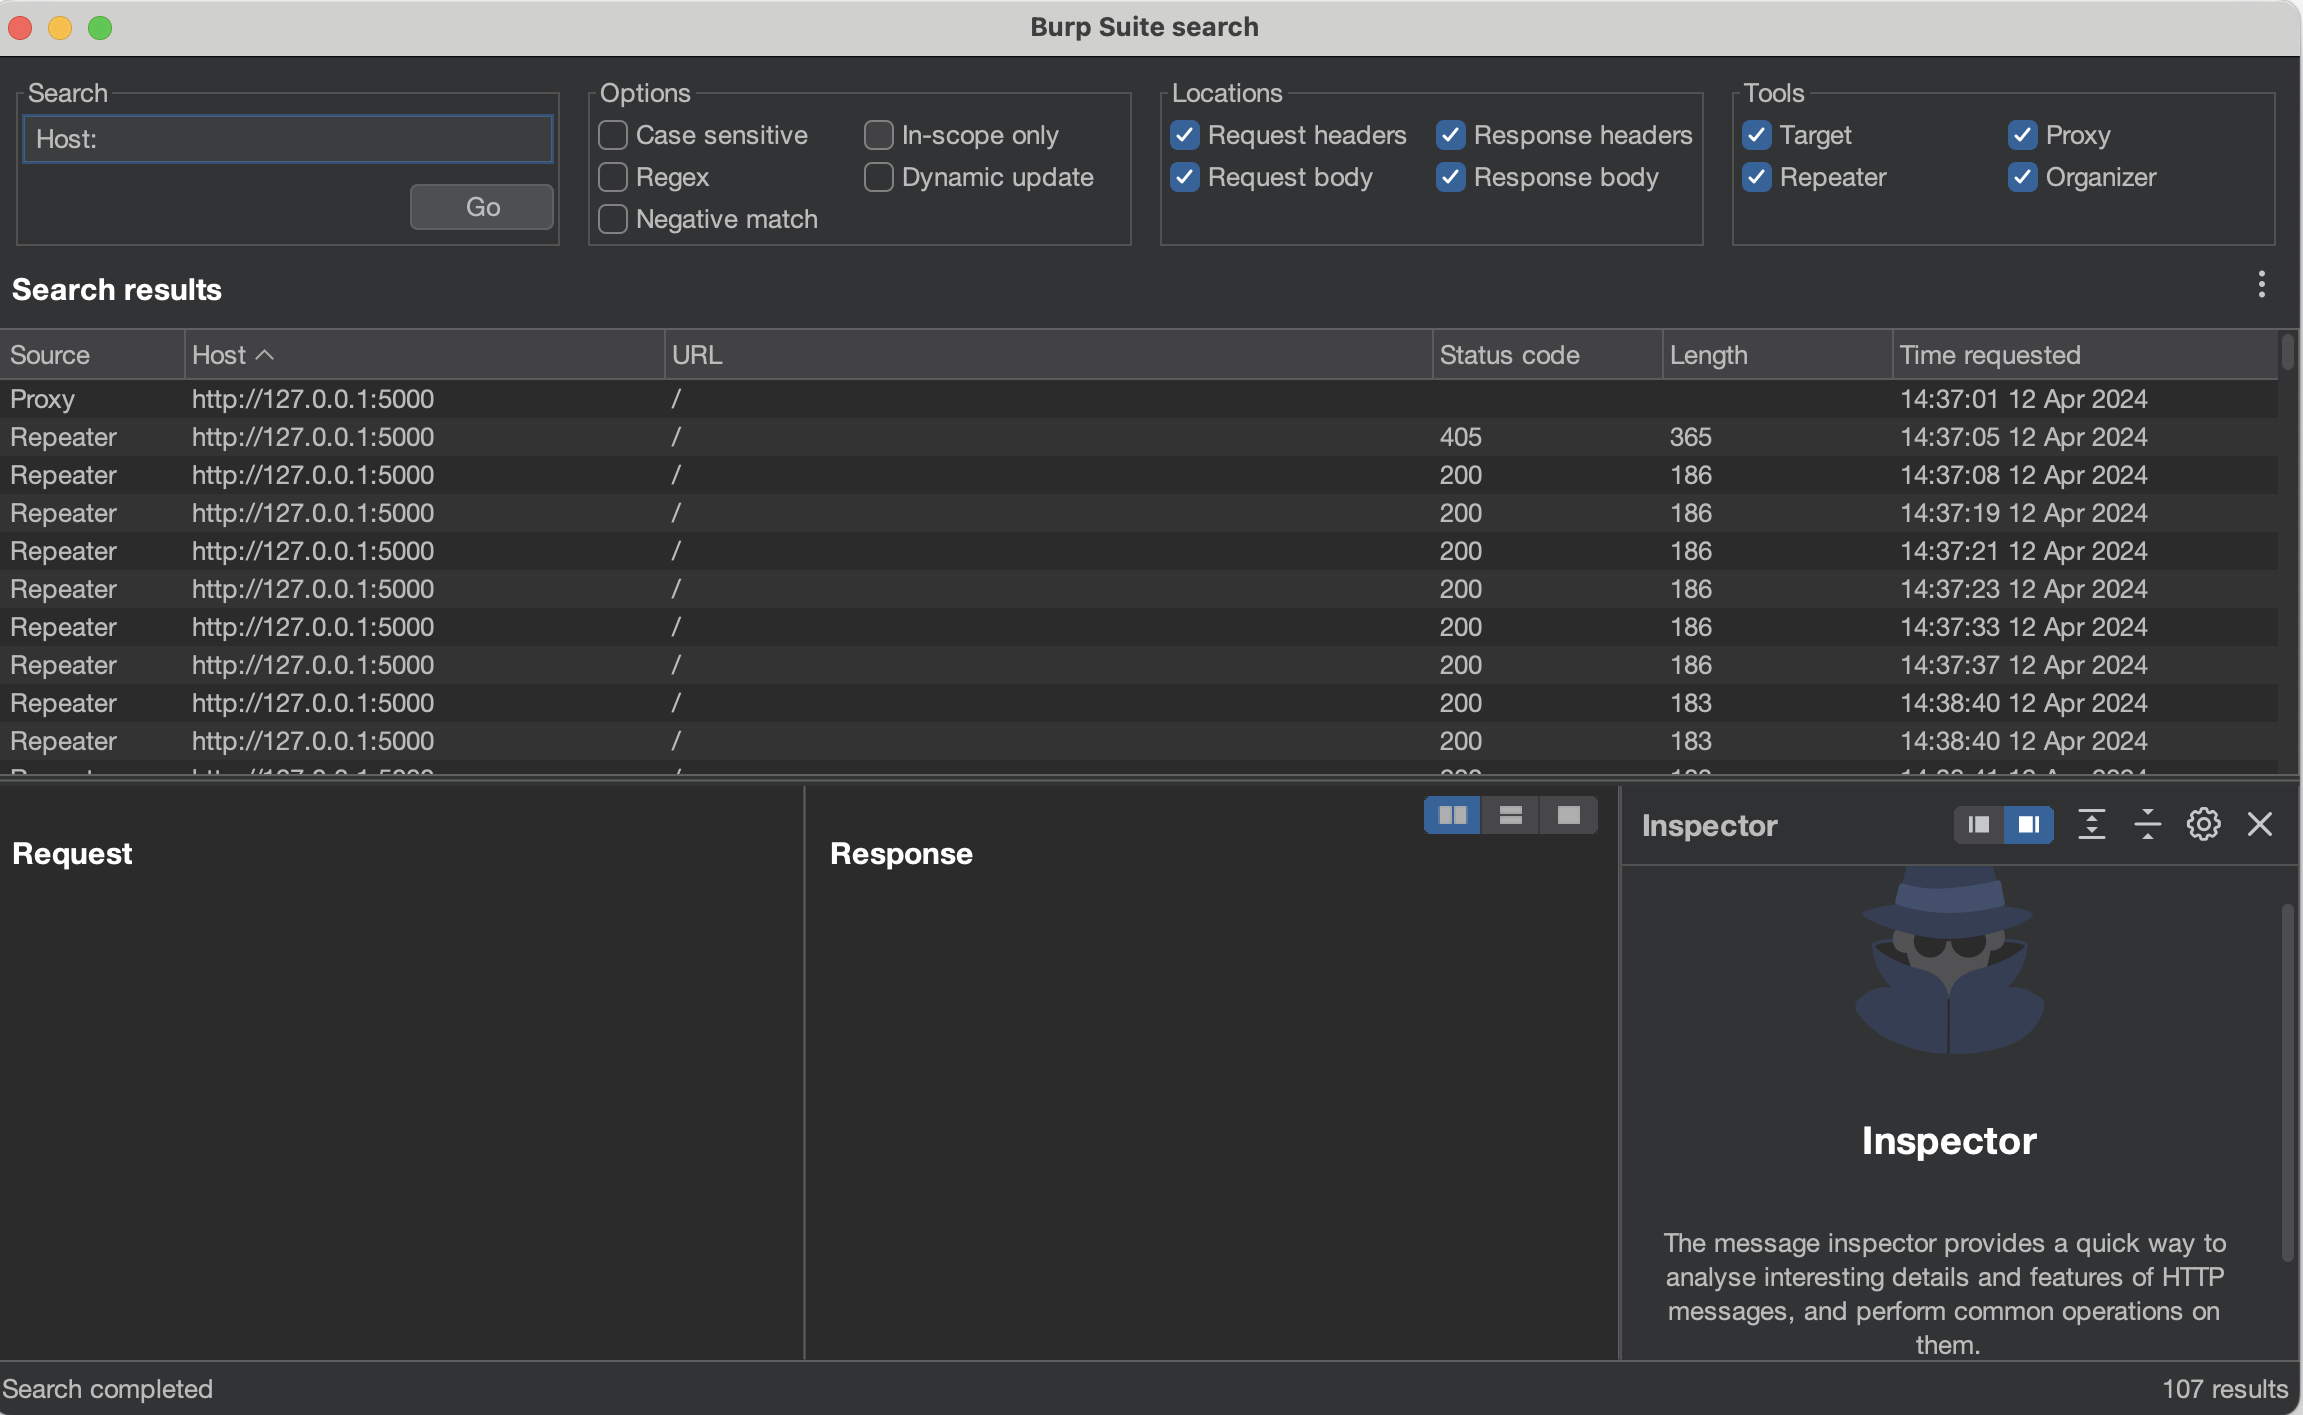
Let’s say you need to find a certain value or error string, but you can’t remember where you saw it (i.e., in which Burp tool). Was it in Burp Repeater, Burp Scanner, Burp Target? To find it, use the global search in Burp Suite (accessible via Burp > Search):

Testing for race condition issues #
Race conditions occur when the timing or ordering of events affects a system’s behavior. In the context of web applications, a race condition could occur if the application’s security decisions depend on the sequence or timing of processed requests. You can learn more about race condition issues on the PortSwigger website.
Using Burp Repeater to test for race conditions #
To conveniently detect race conditions, Burp allows you to group multiple requests and send them in a short time window. So you can prepare multiple requests in Burp Repeater, send them almost simultaneously, and observe the system’s behavior.
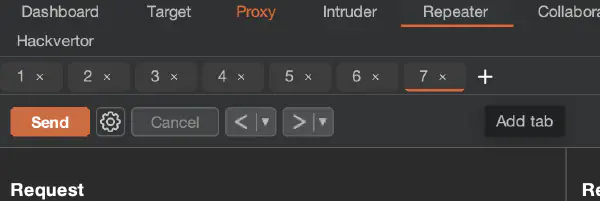
To group multiple requests in Burp Repeater, click the + sign and select Add tab:
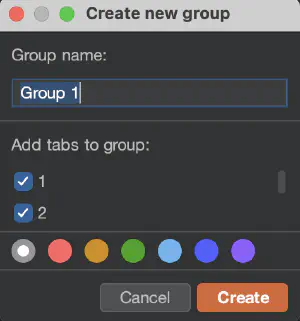
Then click on Create new group and select tabs (previously prepared requests) for the group:
Then select Send group (parallel):
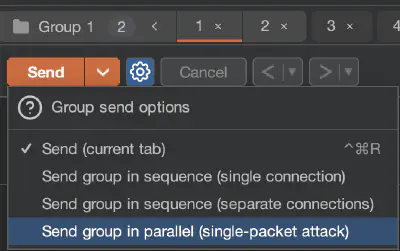
Burp will then send all grouped requests using the following techniques based on the HTTP version of requests:
- For HTTP/1 — last-byte technique
- For HTTP/2 — single-packet attack
You can find more information on specific attack types in the original research, Smashing the state machine: the true potential of web race conditions.
Using Turbo Intruder to test for race conditions #
You can also send multiple instances of a request in parallel using Turbo Intruder. Select the specific
request in Burp (e.g., from Burp Repeater), then right-click on the request
and choose Extensions > Turbo Intruder > Send to Turbo Intruder. Then select the example script, examples/race-single-packet-attack.py:
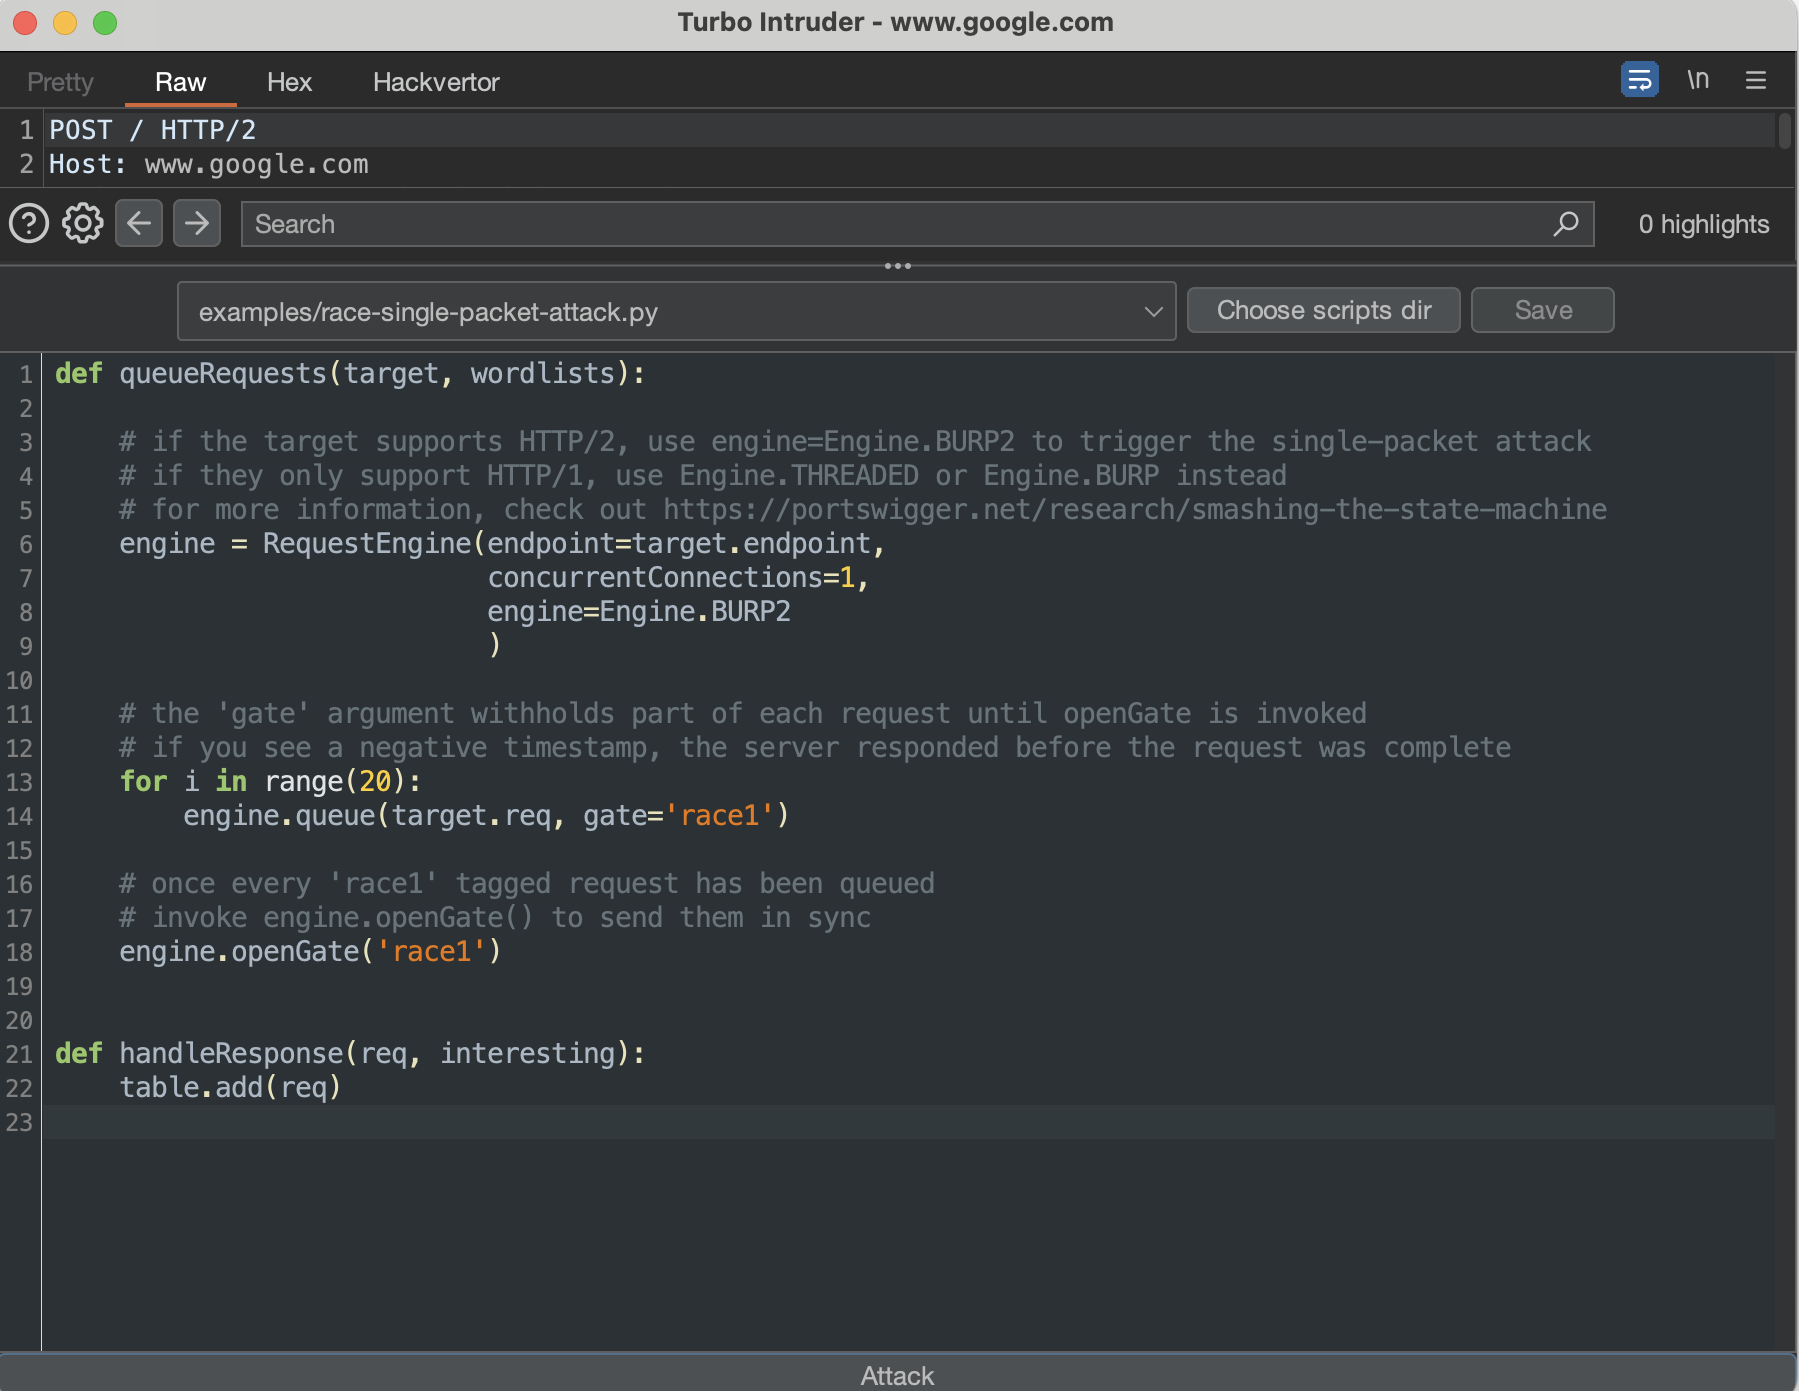
race-single-packet-attack.py Turbo Intruder scriptNext, following comments in the chosen script, adjust the engine (line 8) to the number of queued requests in line 14, click Attack, and observe the results.
If you need to differentiate specific parameters in requests, you can do the following:
Use Hackvertor tags in the request:

An example use of the Hackvertor tag in the requests in Turbo Intruder Use the
%sinjection point (e.g., iteratoriof theforloop). To configure the injection point, put the%splaceholder in the request and edit the engine queue to include the iteratorias follows:engine.queue(target.req, str(i), gate=’race1’):
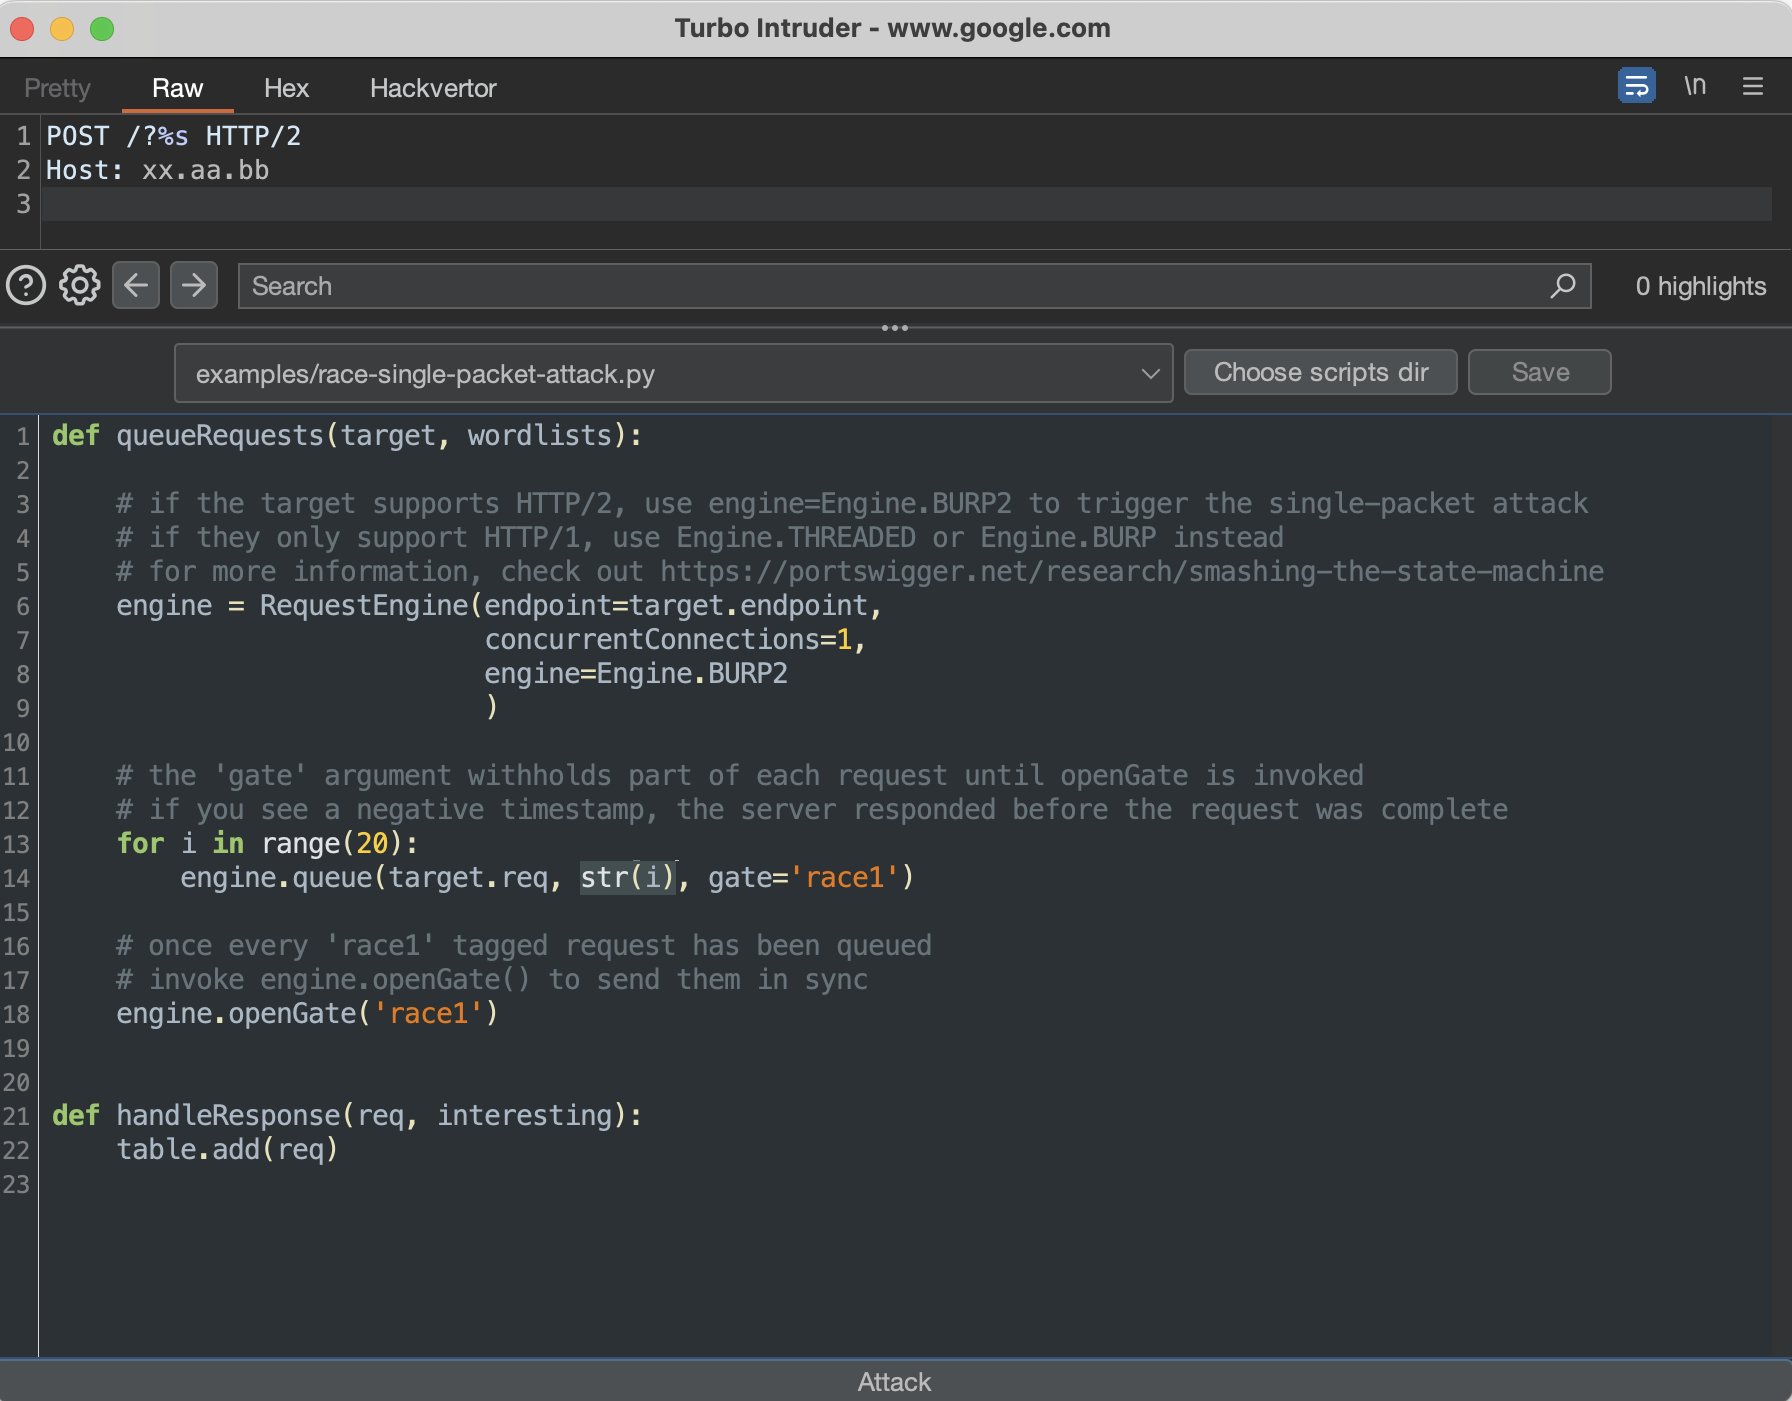
This way, wherever you place %s, it will be replaced with an iterative number in the request.
Using Backslash Powered Scanner for automated identification of potential race conditions #
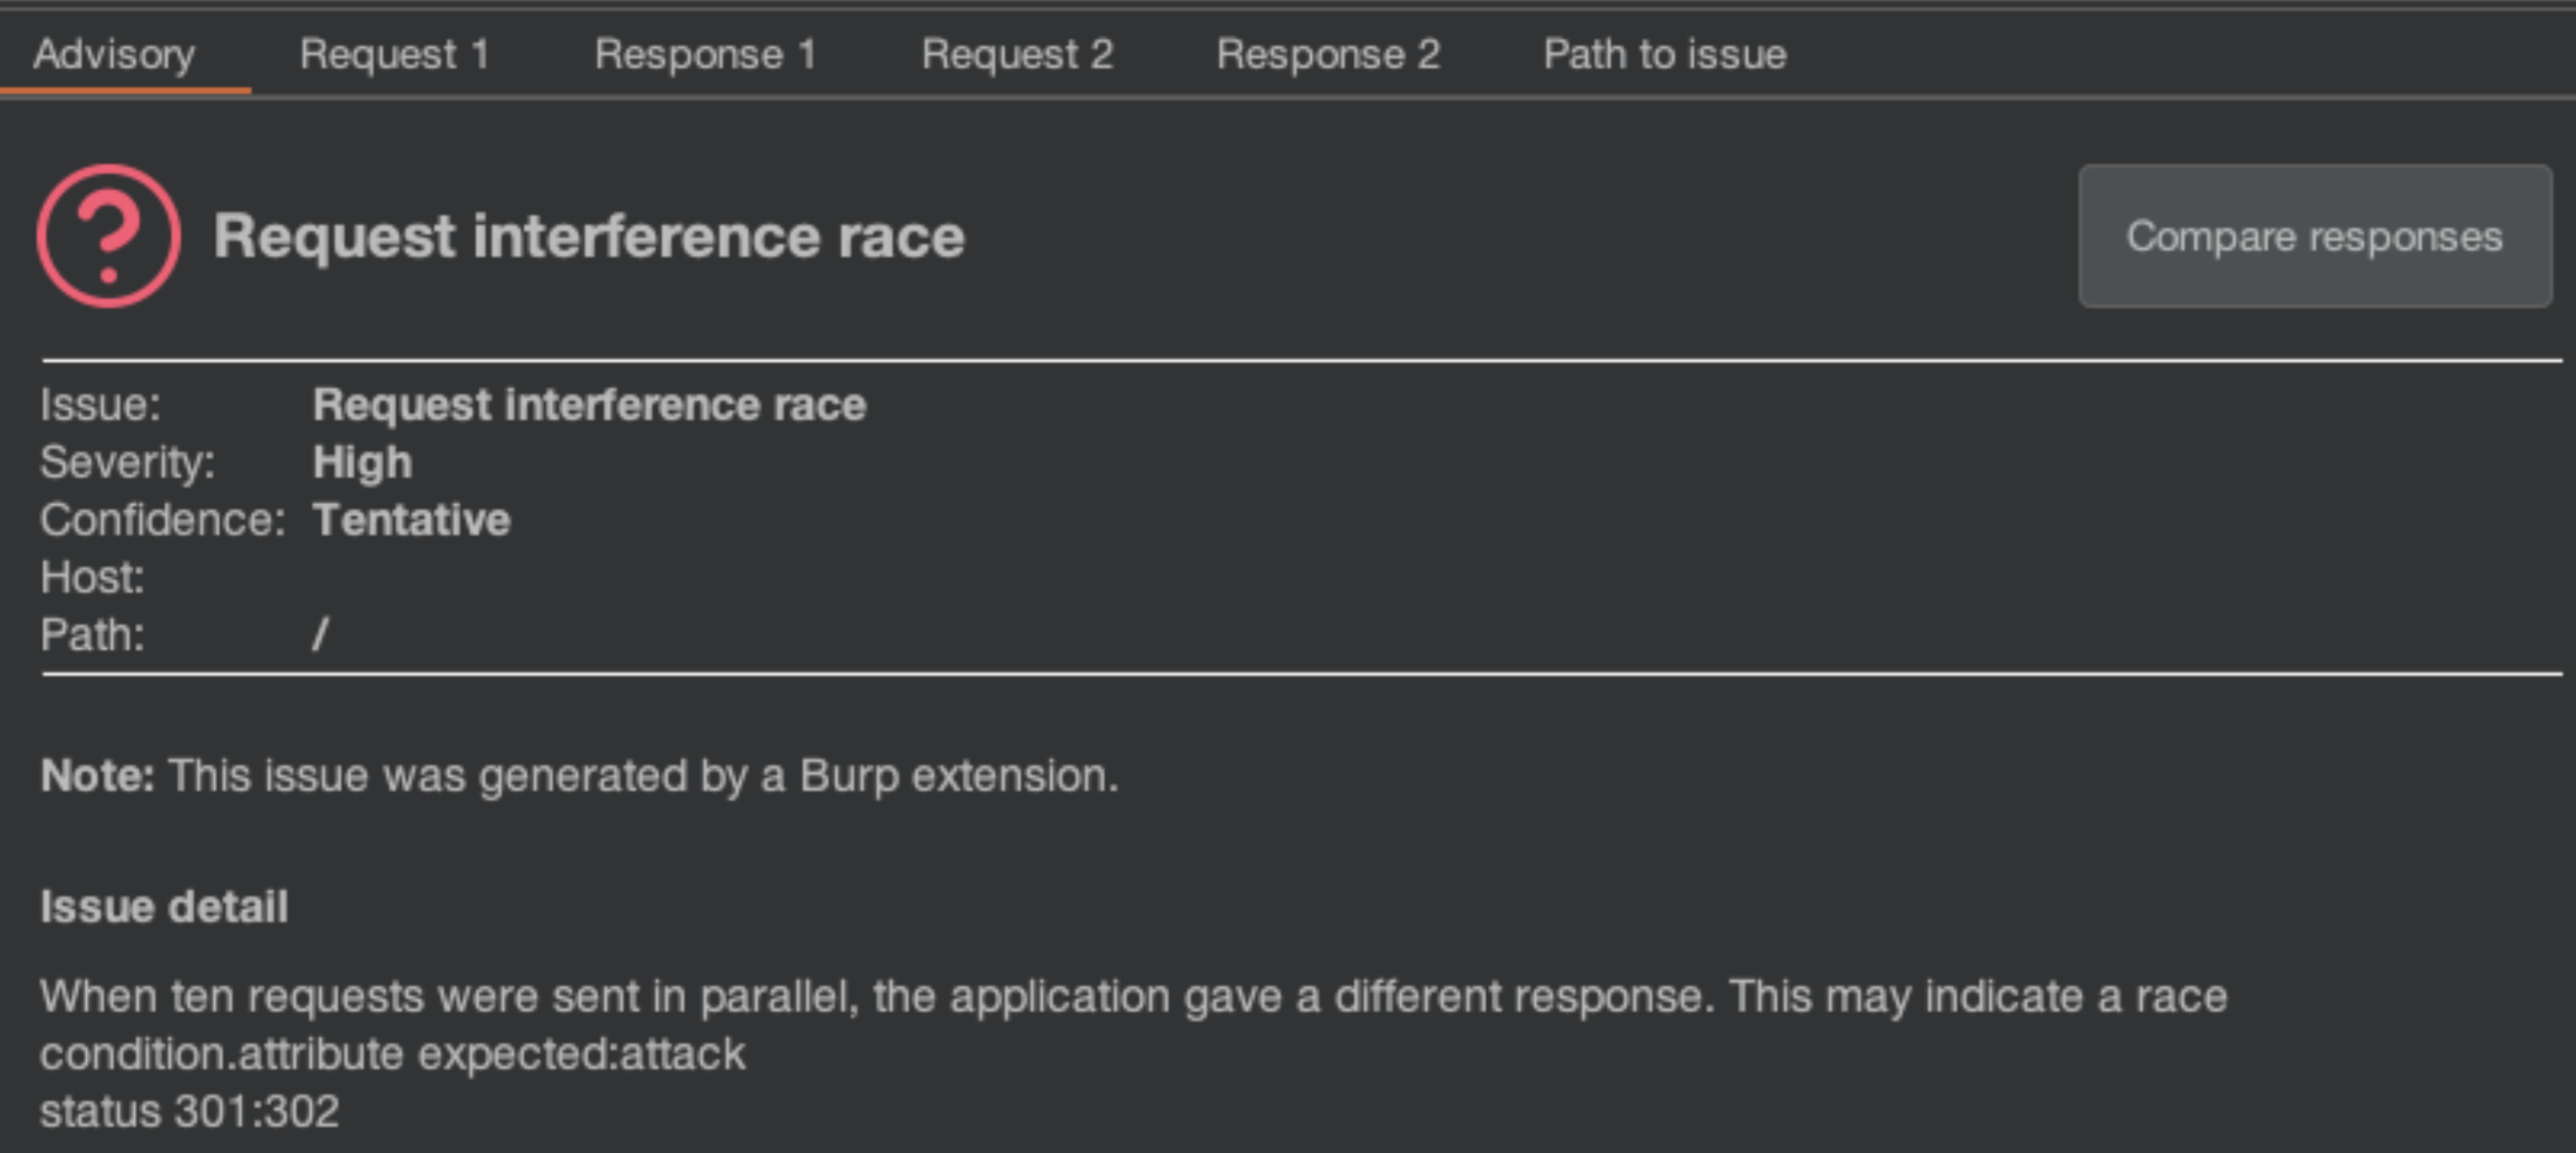
To automatically probe for potential race conditions in your target, you must enable the Backslash Powered Scanner and run an active scan.
The following is an example issue raised by the extension in the Issues tab:
Testing for access control issues #
You can learn about access control issues in Access control vulnerabilities and privilege escalation.
Access controls in web applications are typically defined by user roles. For example, there may be regular end-user accounts and administrator accounts. Each of these roles may have different access rights within the application. In this context, each role should be validated on the server side based on the authorization cookie or header. The Autorize extension is tailored to make testing access controls in web applications flexible and efficient.
The general rule for using Autorize is to add the authorization cookie or headers of another application role to the extension, configure optional detectors, and browse the application. When you go through the application, requests are resent with modified parts (such as headers or cookies). We are essentially forging a different user role than what is expected. Autorize automatically modifies and resends intercepted requests with these substituted session identifiers. This allows us to investigate whether the server appropriately authorizes each incoming request, revealing any discrepancies in access controls, such as a regular user accessing administrative functions. Also, it’s possible to check out the unauthenticated perspective, where requests are sent without a specific header or cookie.
The Autorize table displays the request URL and enforcement status:
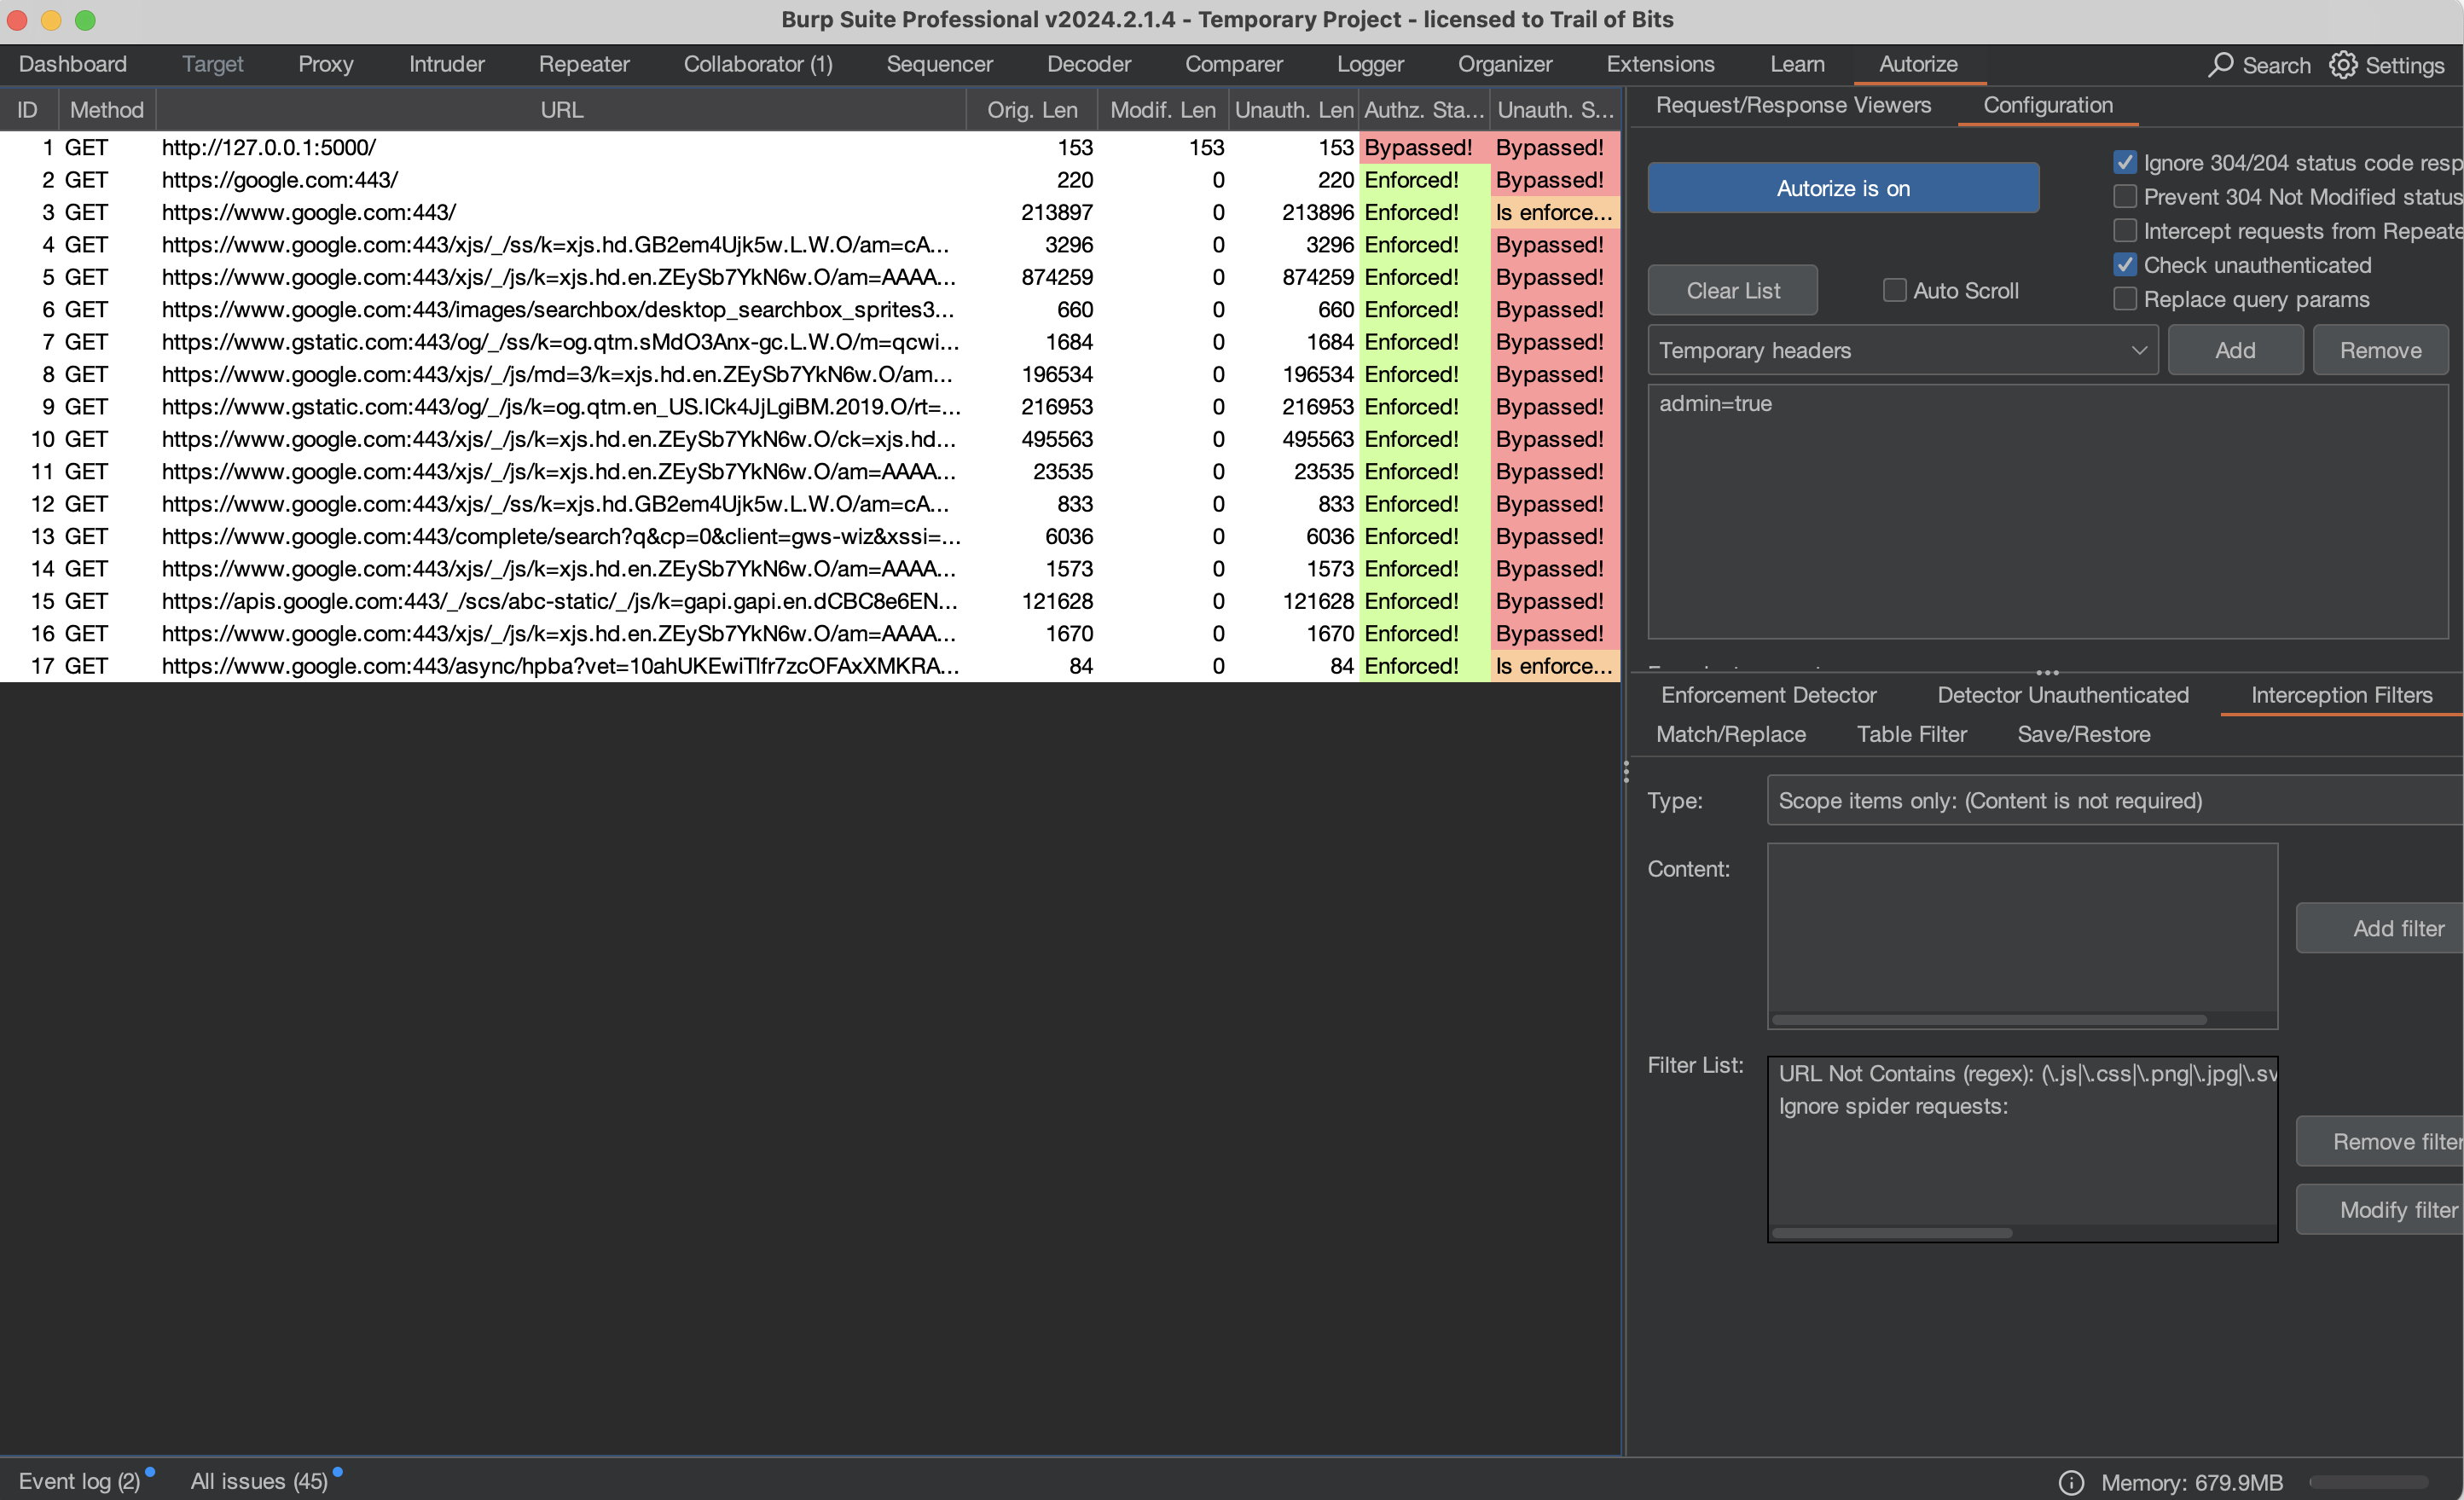
The following are useful tips when using the Autorize extension:
- Don’t forget to use the Check Unauthenticated functionality.
- Narrow down the source of the request sent to Autorize by setting up interception filters. For example, include only scope items
and ignore
OPTIONSrequests and other unnecessary requests from an authorization testing perspective. - Always adjust the Enforcement Detector and Detector Unauthenticated functionalities accordingly to avoid missing bugs.
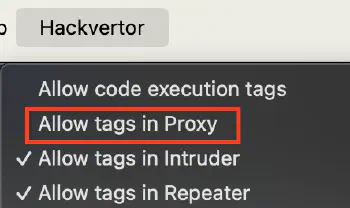
- Carefully review the results. Be aware of caveats. For example, some parameters in requests must be unique, so Autorize will not analyze authorization issues properly because the application can return an error due to that uniqueness. To solve this problem, you can use the Hackvertor extension in the original request sent to Autorize, and Autorize will process its tags. To use Hackvertor tags in Burp Proxy, enable them in the settings by selecting Allow tags in Proxy:
References:
- Autorize: automatic authorization enforcement detection extension
- Finding “BAC - IDOR -PE” Within a Minute using Autorize Tool
- Burp Suite tutorial: IDOR vulnerability automation using Autorize and AutoRepeater (bug bounty)
If the Autorize extension is not enough for your target, try using the AutoRepeater extension, which can automatically duplicate, modify, and resend any request. It also has many conditional replacement options. For more information, see the following resources:
- Burp Repeater - whether user permissions are working properly
- BSides Rochester 2018 - AutoRepeater: Automated HTTP Request Repeating With Burp Suite
- AutoRepeater: Automated HTTP Request Repeating With Burp Suite
Run Collaborator Everywhere #
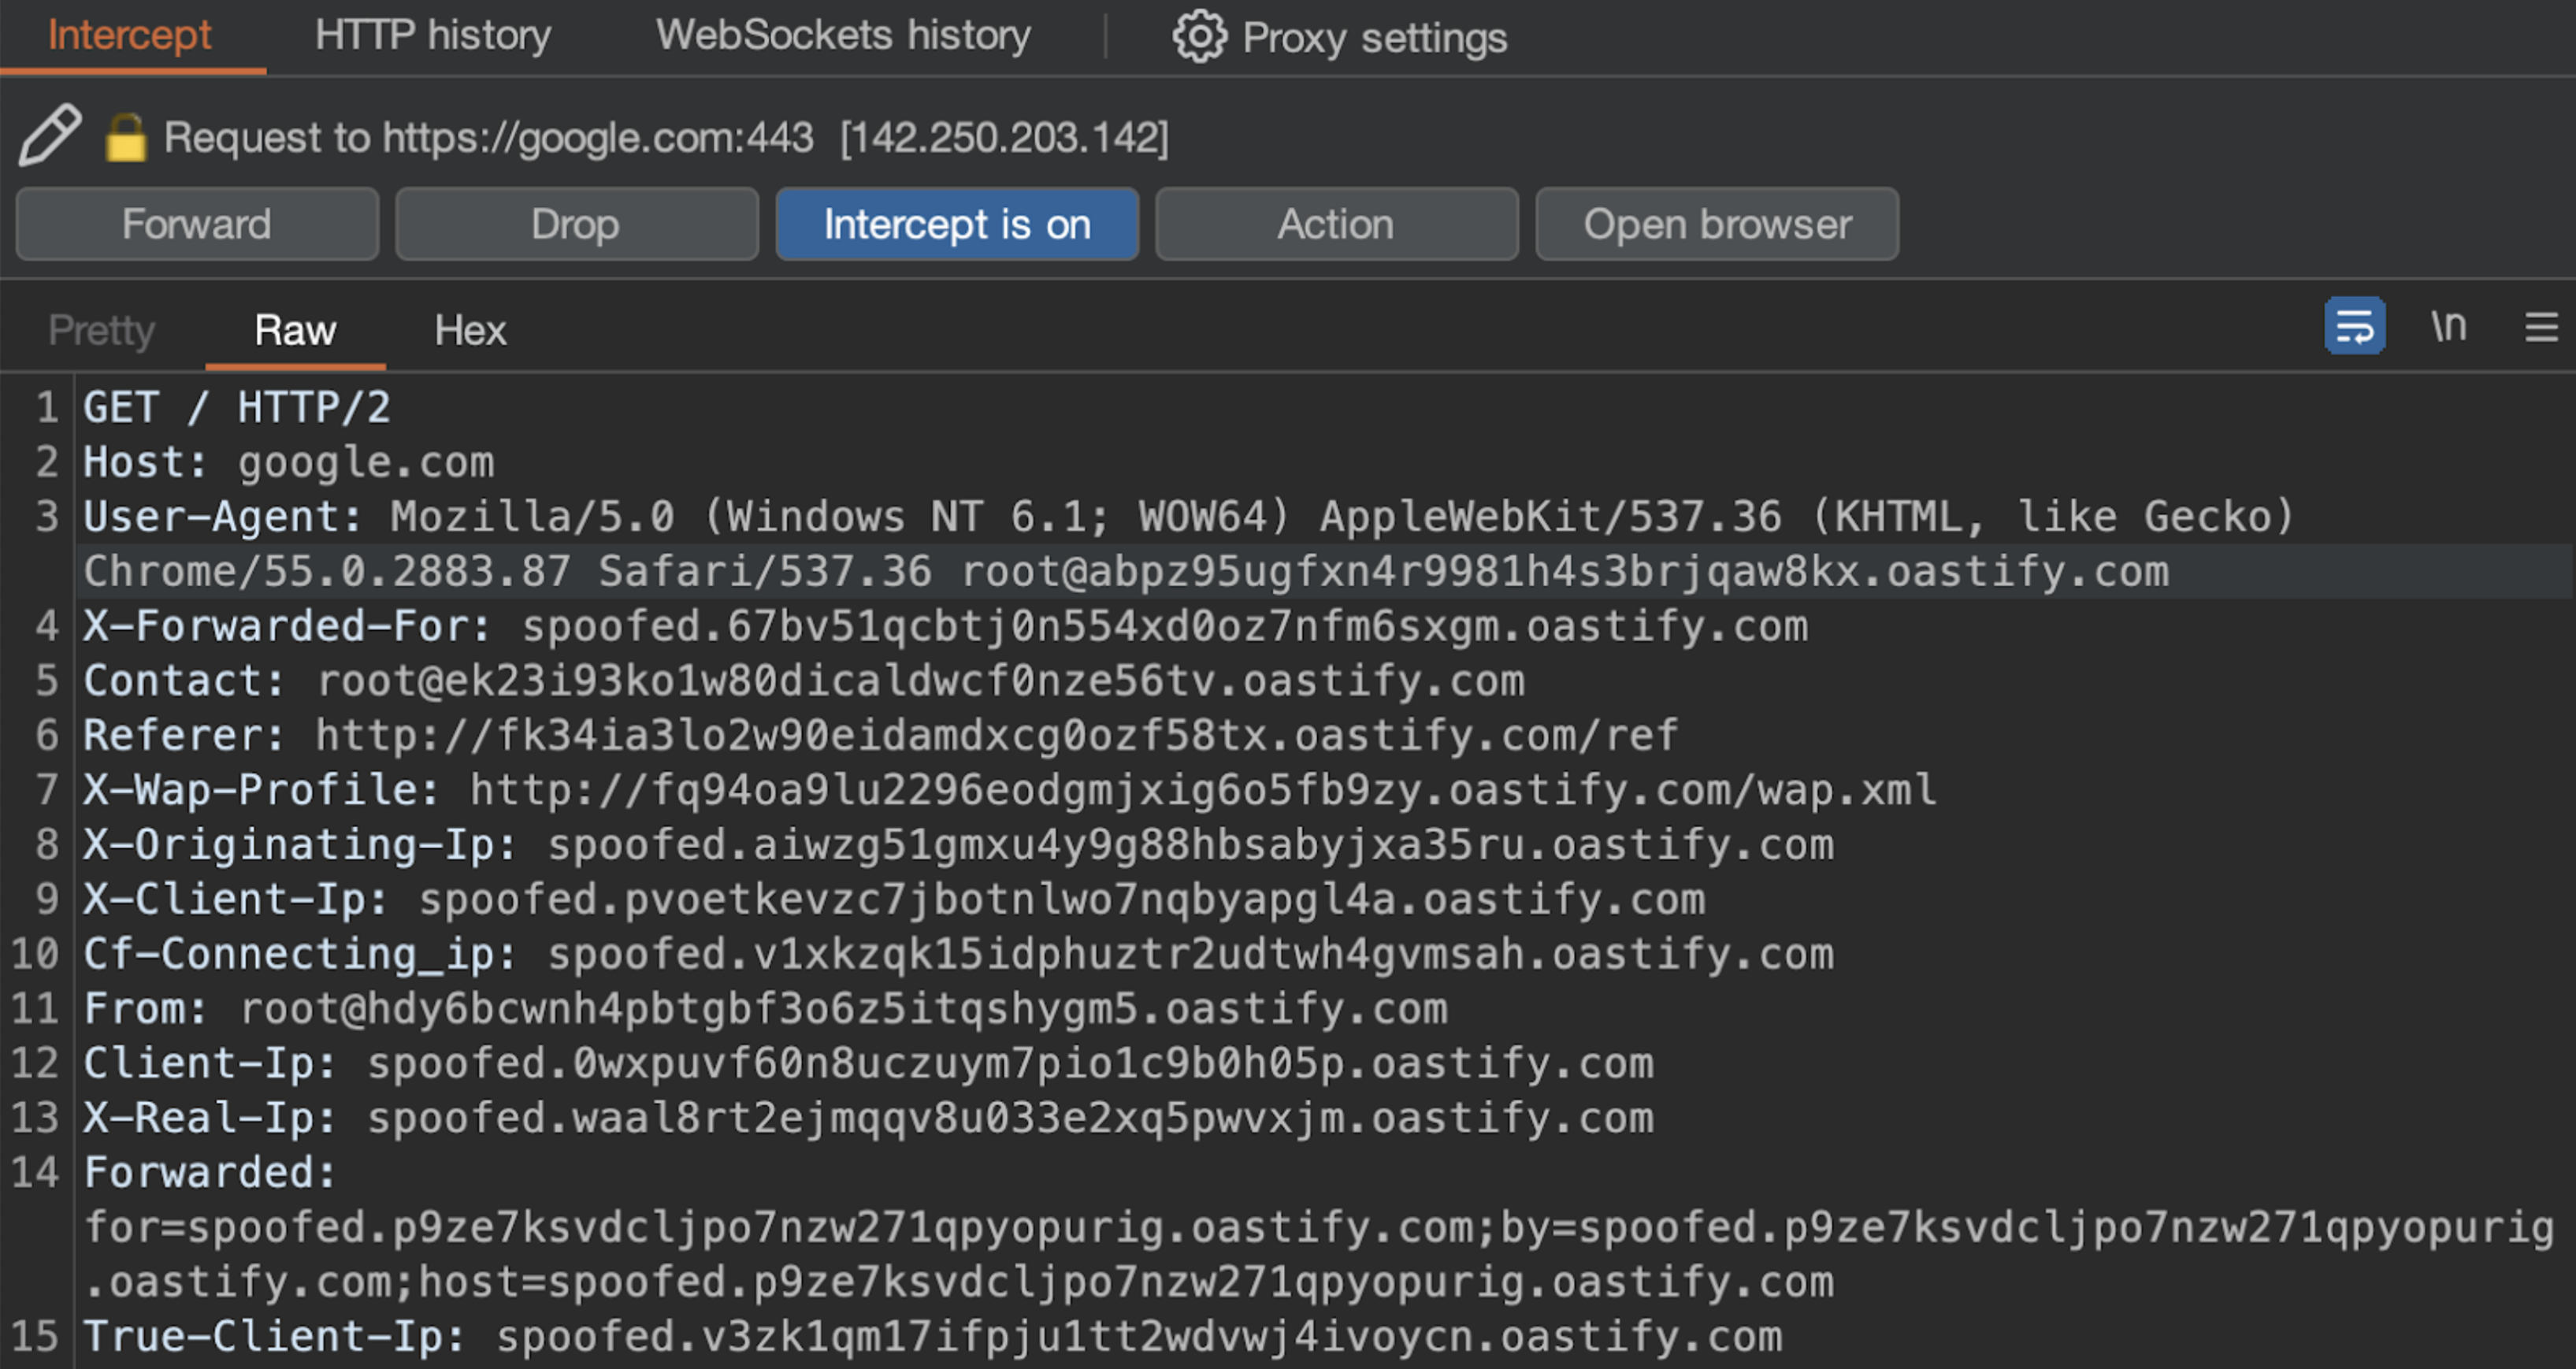
The Collaborator Everywhere extension adds noninvasive headers designed to reveal back-end systems by triggering pingbacks to Burp Collaborator. You can also detect potential IP spoofing when the web application returns the potentially real IP address based on the user-controlled header. However, the added headers may interfere with the normal functionality of the web application. So you don’t need to have the extension enabled all the time, but we recommend taking at least one shot in each corner of the application.
The Collaborator Everywhere extension adds appropriate headers and a payload to the User-Agent header in the in-scope proxy traffic:
For more information on exploitation issues raised by Collaborator Everywhere, see Cracking the lens: targeting HTTP’s hidden attack-surface.
Responses can be intercepted/changed too #
Even though we generally intercept requests and modify them to obtain specific results in Burp, intercepting HTTP responses can be beneficial for the following reasons:
To analyze how the content is rendered in a mobile application
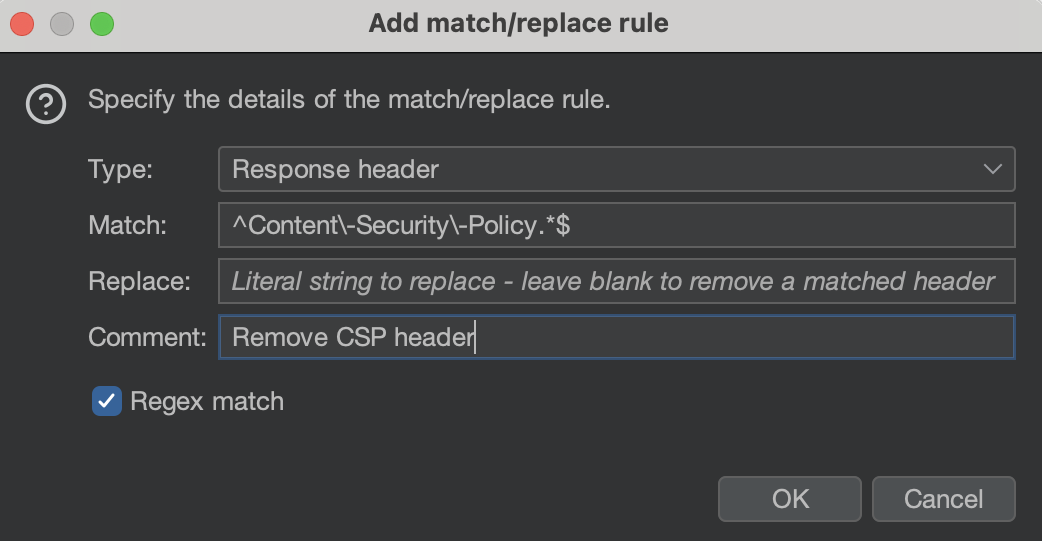
To remove/modify specific response headers (such as
Content-Security-Policy)To modify the response:
b. Enable disabled form fields
c. Remove input field length limits
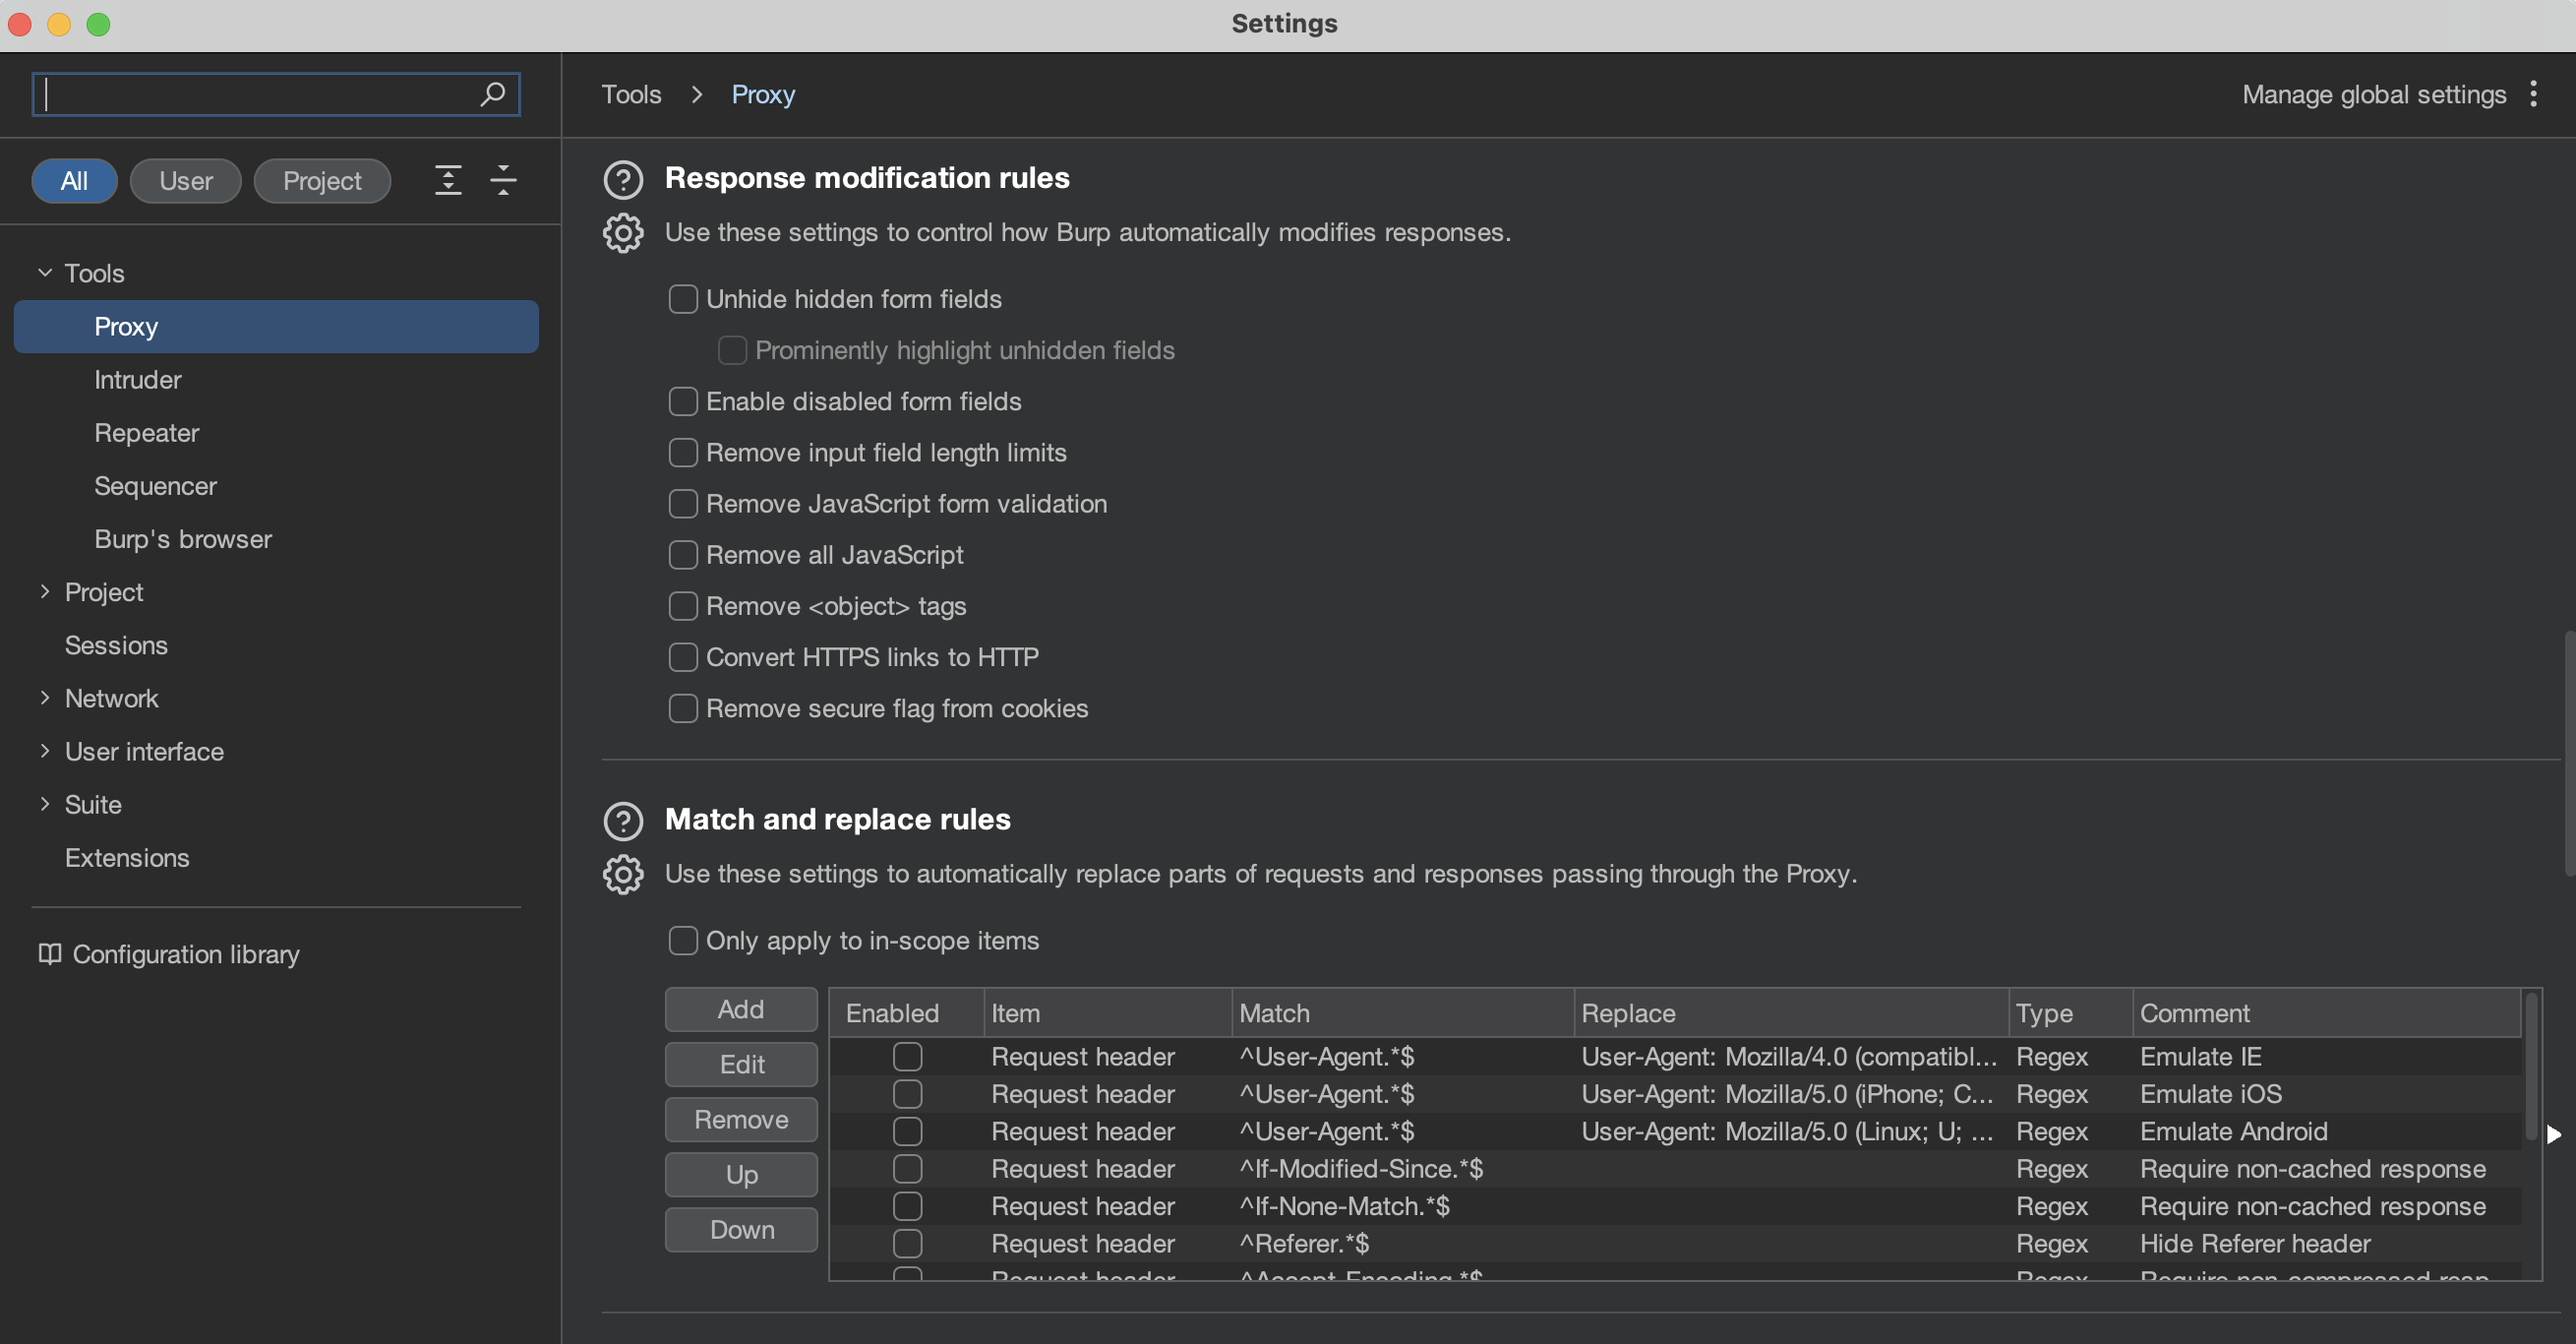
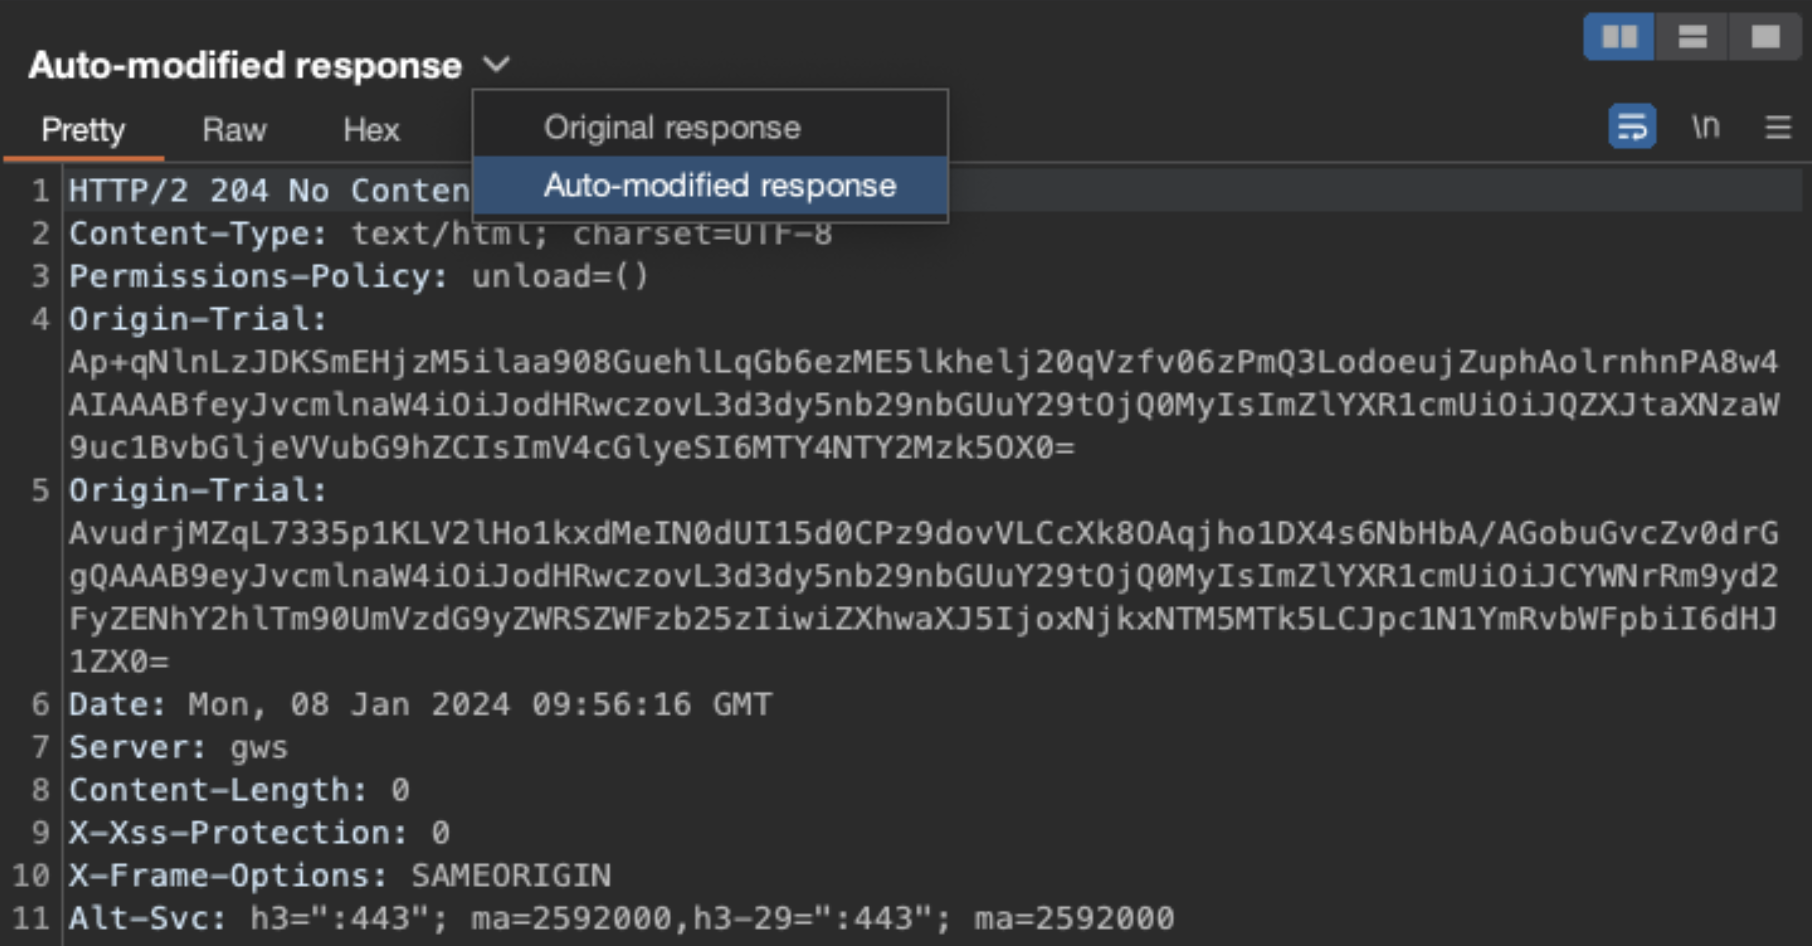
For example, to remove the Content-Security-Policy header from the response, under the Match and replace rules header,
select Add:
Then, in HTTP history, you can see a tick in Edited.
After selecting the request, choose the Auto-modified response to show that Burp removed the CSP header:
Resources:
Shutting down all tasks #
If you want to shut down all tasks (e.g., active Burp Scanner, Burp Intruder) in Burp, you generally can use this power button:
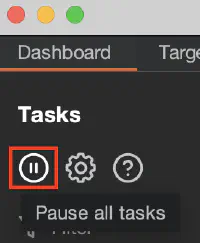
The button pauses all tasks but does not pause running extensions. So if you have a running extension issuing requests, they are still being sent. For example, when you use the Param Miner extension, you can see in Logger that when you pause task execution, requests are still being sent.
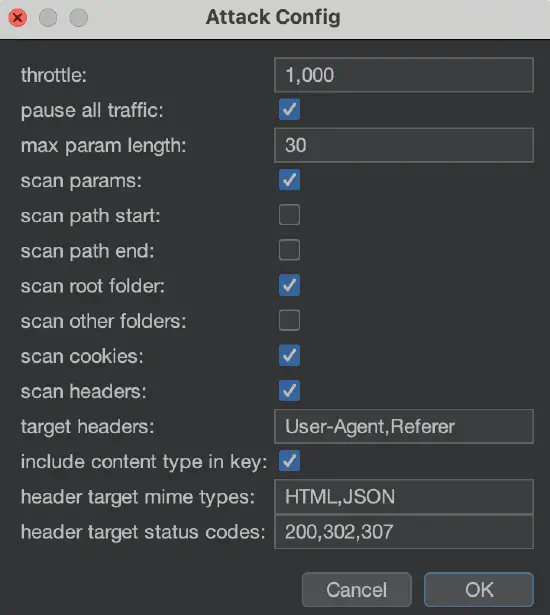
If you want to pull the red emergency brake (i.e., pause all traffic), use the Distribute Damage extension and select pause all traffic:
BChecks #
The standard library of passive and active scan checks in Burp is extensive. Also, all the available extensions expand the library significantly. Nevertheless, what if you would like custom checks tailored to your organization or want to hunt for a specific bug not covered by Burp? The simple solution is BChecks.
What are BChecks? #
The official documentation states the following:
BChecks are custom scan checks that you can create and import. Burp Scanner runs these checks in addition to its built-in scanning routine, helping you to target your scans and make your testing workflow as efficient as possible.
BChecks are written in a .bcheck file extension with a plaintext, custom definition language to declare the behavior of the check.
For more information, see
BCheck examples.
See the example,
suspicious-input-transformation.bcheck.
Taking a closer look at this BCheck file, we notice that this particular check is designed to identify suspicious input
transformation that might suggest the application is vulnerable to some kind of server-side code injection,
such as server-side template injection.
Here is what’s happening in suspicious-input-transformation.bcheck:
metadata: This section provides basic information about the BCheck.
define: This section defines two variables. The calculation variable is set to a string representation of a mathematical calculation (
1337*1337), and the answer variable is set to the result of that calculation (1787569).given insertion point then: This is the start of the BCheck’s main logic.
report issue: This section describes the reported issue (severity, confidence, details, and remediation).
metadata:
    language: v1-beta
    name: "Insertion-point-level"
    description: "Inserts a calculation into each parameter to detect suspicious input transformation"
    author: "Carlos Montoya"

define:
    calculation = "{{1337*1337}}"
    answer = "1787569"

# we will automatically insert into nested insertion points
given insertion point then
    # prevent false positives by checking answer isn't
    # already in base response
    if not({answer} in {base.response}) then
        send payload:
            appending: {calculation}

        if {answer} in {latest.response} then
            report issue:
                severity: high
                confidence: tentative
                detail: "The application transforms input in a way that suggests it might be
                         vulnerable to some kind of server-side code injection."
                remediation: "Manual investigation is advised."
        end if
    end if
suspicious-input-transformation.bcheck fileWhy BChecks? #
Crafting your extension to add custom checks is an option, but it’s not a trivial process. It requires a significant amount of time and expertise in programming. BChecks, on the other hand, offers a simpler solution. It allows you to automate your passive and active hunts without extensive coding.
For example, you can automate the search with a regex to see if there is any information disclosing LDAP in use. This can be particularly useful if you’re looking for potential application information disclosure. With BChecks, you can set up this check once and run it automatically in all future scans.
BChecks collection #
For more examples of what you can do with BChecks, check out the official BChecks collection for Burp Suite Professional. It can serve as a good starting point for creating your checks. You can learn from the examples and modify them to suit your needs.
BChecks for Organizations #
BChecks are not only personal but can also be applicable across an entire organization. You can distribute the BChecks
(in the form of *.bcheck files) to team members, enabling everyone to look for the same bugs.
Filtering the HTTP history with Bambdas #
Bambda mode allows you to use small snippets of Java to customize your Burp tools. For example, the following
Bambda
allows you to find JSON responses with the wrong Content-Type in the HTTP history.
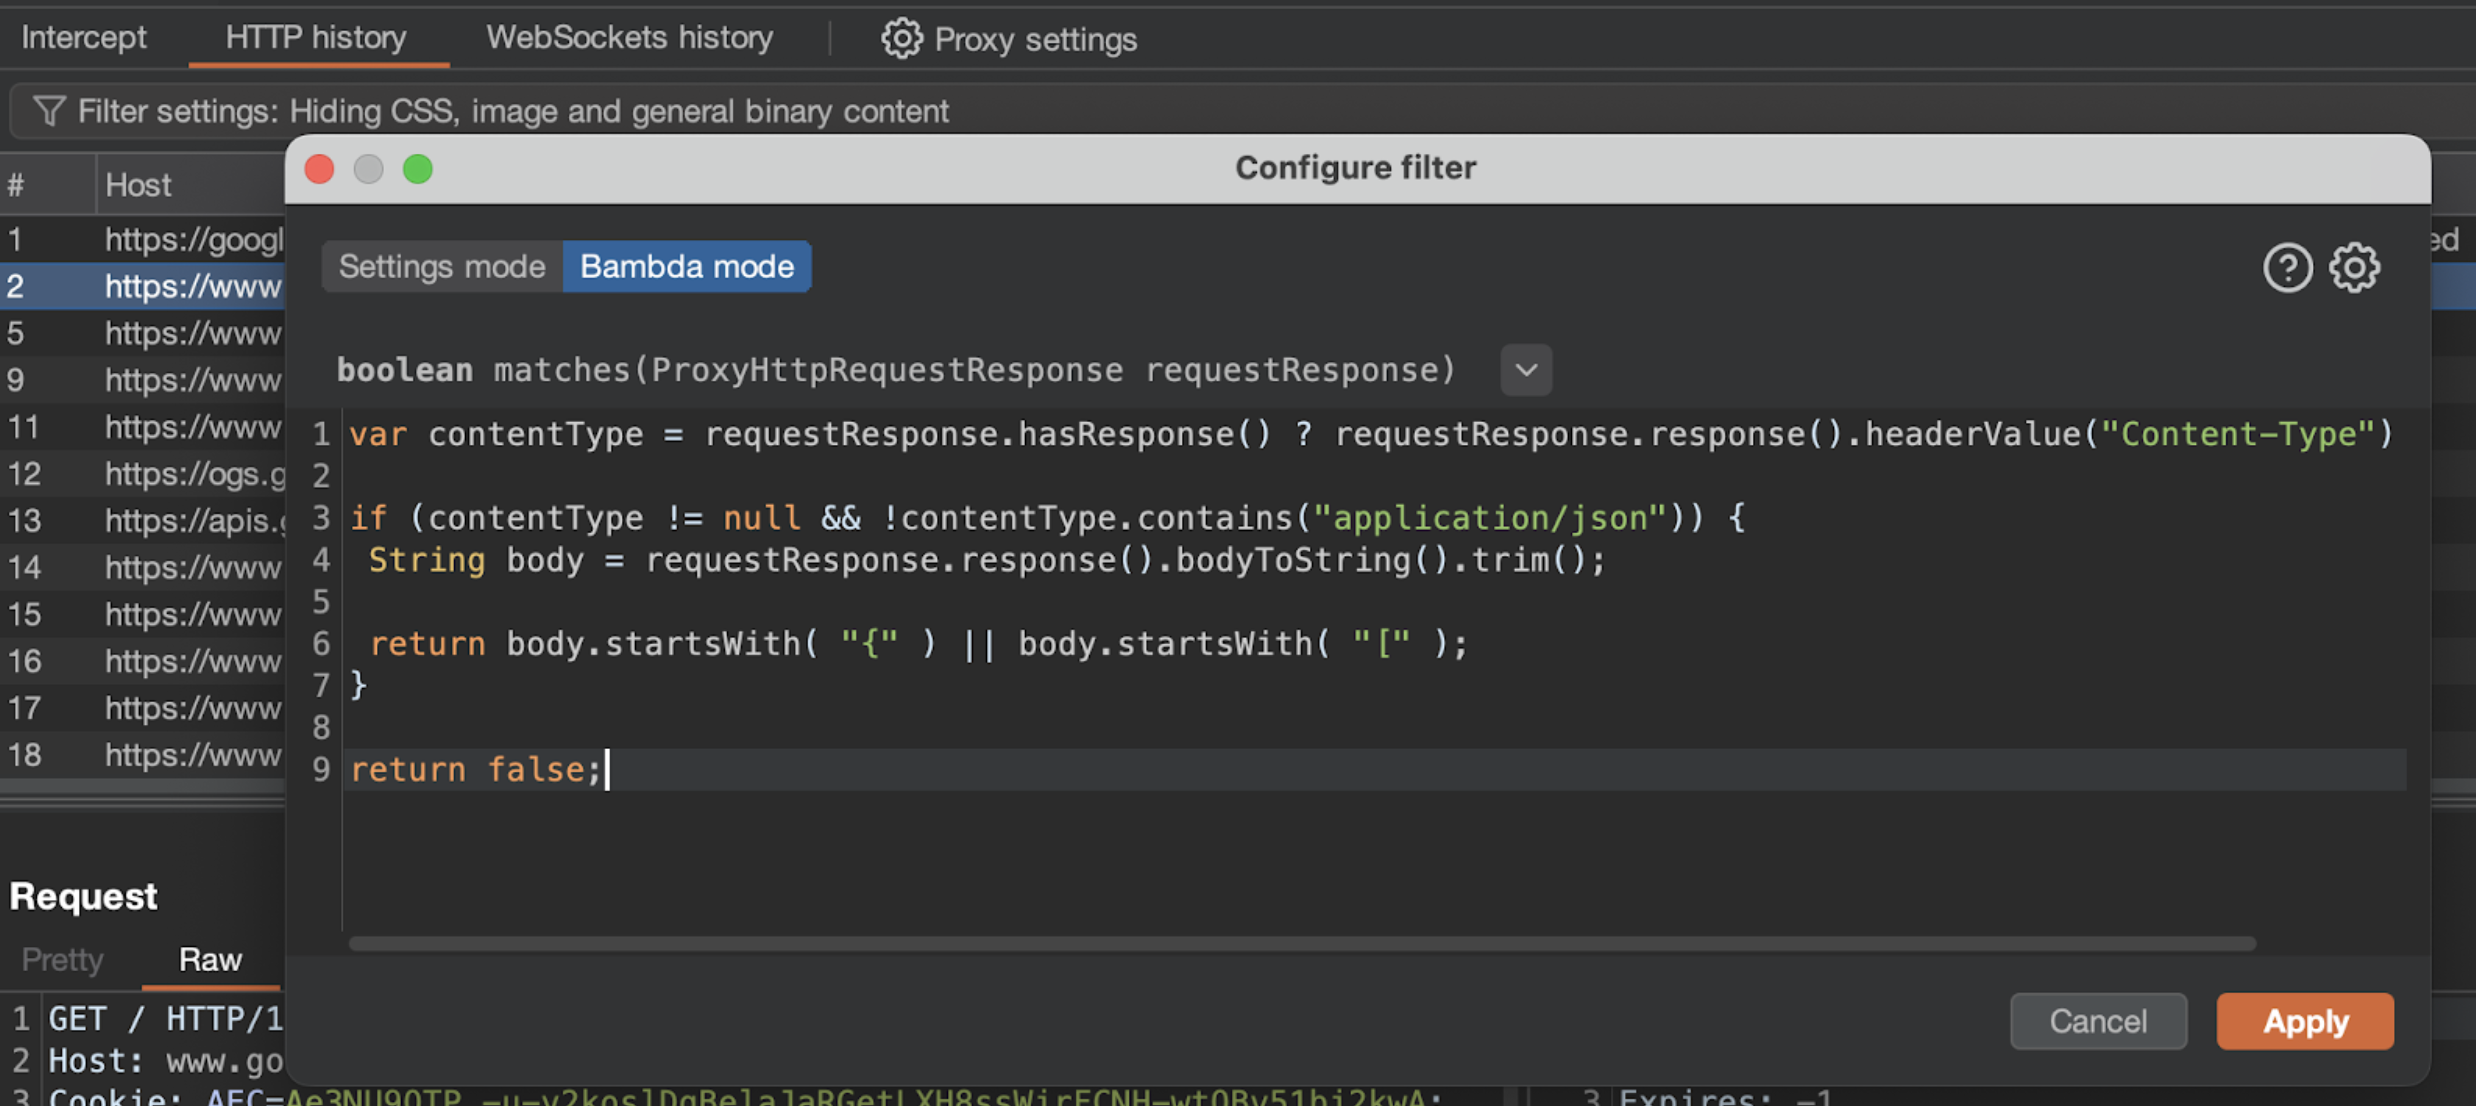
See more Bambdas in the Bambdas collection on GitHub and read the documentation on Filtering the HTTP history with Bambdas.
Custom Hackvertor tags #
The Hackvertor extension allows you to configure your own tags based on Python or JavaScript.
See this example usage:
If you're testing a site that needs a unique CSRF-token for each call, you can use Hackvertor's custom tags to make a simple python script to fetch a new token for you. Very simple solution and works very nicely. Thank you again @garethheyes!https://t.co/nd2cxTPQiL pic.twitter.com/Vlp1Anxeqk
— Frans Rosén (@fransrosen) February 16, 2021
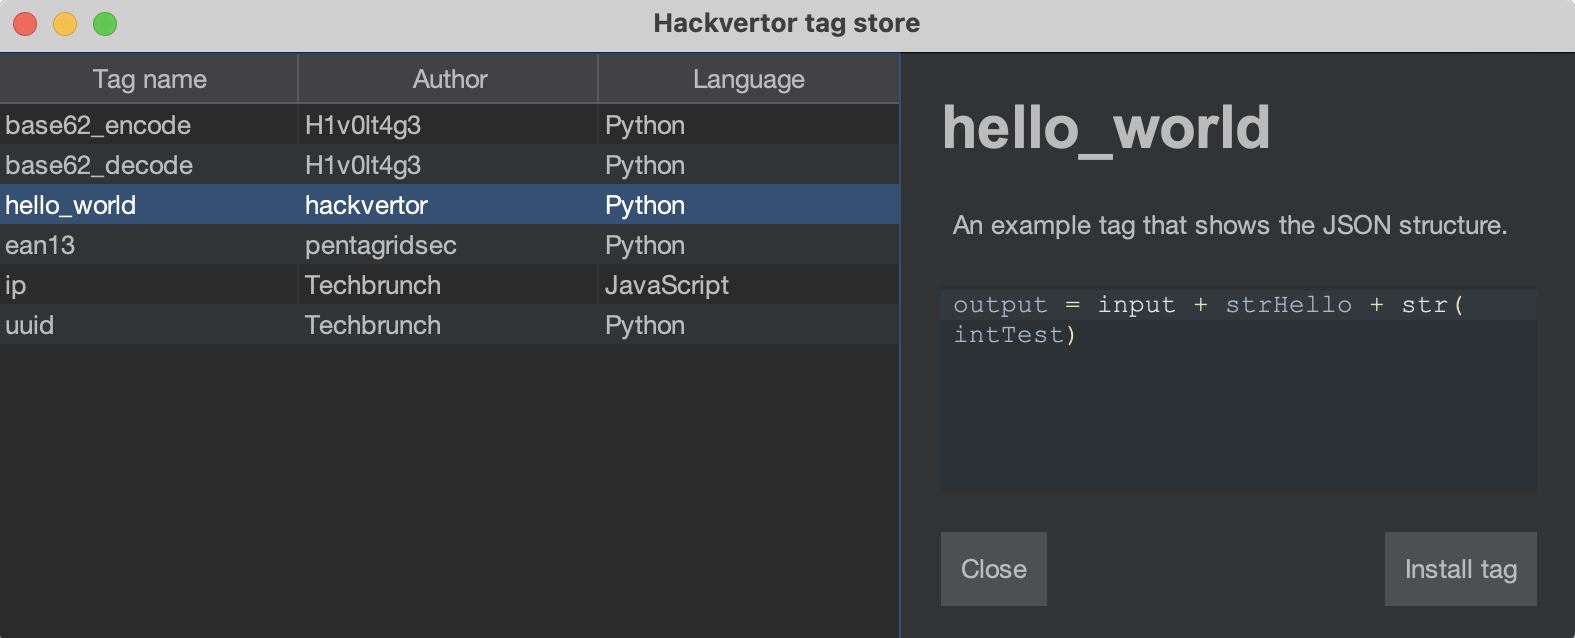
Also see the official Hackvertor tag store:
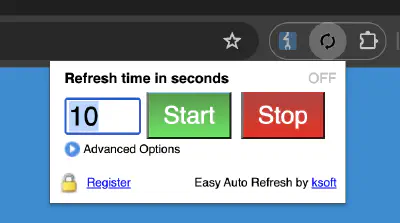
Leveraging Easy Auto Refresh Chrome extension with Burp #
Combine the Easy Auto Refresh Chrome extension with Burp for the easiest way to extend your session and prevent automatic logout. Just set the appropriate refresh time in the extension and proxy the traffic through Burp. The site should keep you logged in. If the cookies change, Burp’s cookie jar will automatically update the cookies in the appropriate requests issued by Burp Scanner.
If the refresh action in the target site automatically goes through the entire authentication flow and obtains
a new Authorization: Bearer token required by the target, you can install the Authorization Bearer Detector and Replacer
custom extension (figure 22). This will avoid the situation where the authorization header expires and requests sent by Burp
return a “401 Unauthorized” error. The extension reads the authorization header from traffic proxied by the browser and replaces
it when the old header expires in requests sent by Burp.
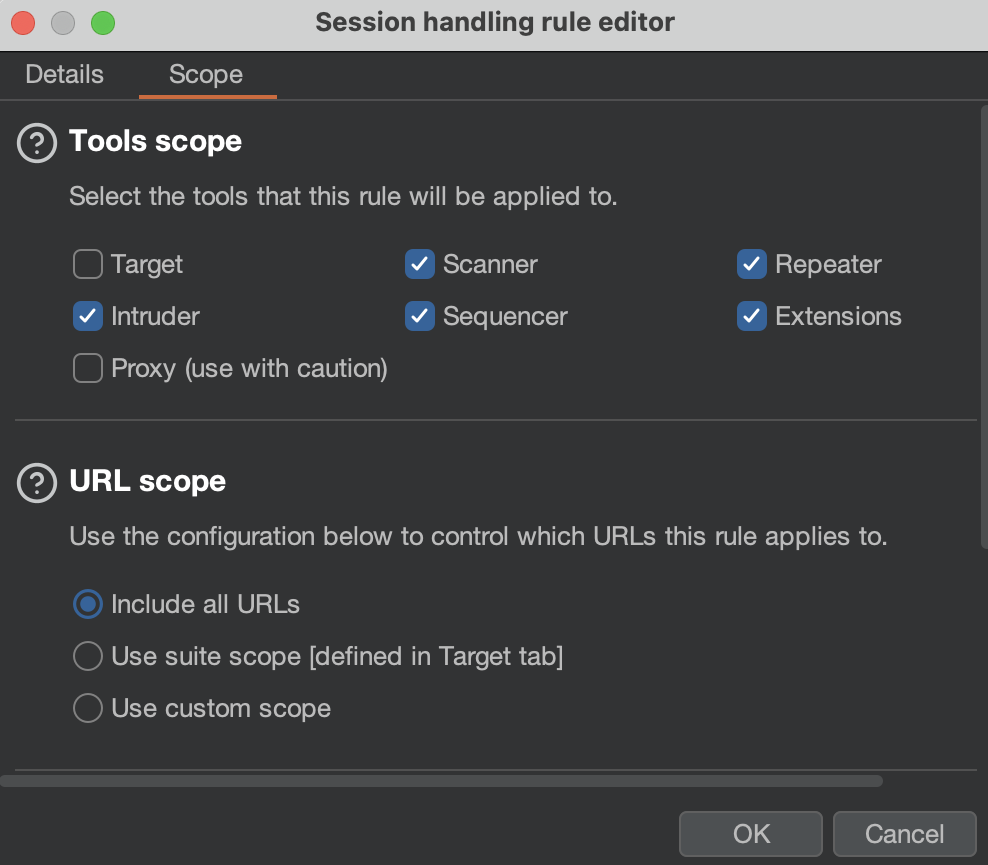
To make it work, install the extension (figure 23), edit the target hostname (line 19), and add a new session handling rule to enable the custom extension in Burp Scanner and Burp’s extensions. In Burp’s settings, go to the Sessions tab and add a new session handling rule. In Rule actions, select Add and Invoke a Burp extension, then select the Replace Authorization Bearer Token in the extension action handler. In the Session handling rule editor window, go to the Scope tab and select the Scanner and Extensions in the Tools scope.

 1from burp import IBurpExtender, IProxyListener, IHttpRequestResponse, IExtensionHelpers, ISessionHandlingAction, IRequestInfo
 2from java.util import ArrayList
 3from java.net import URL
 4
 5class BurpExtender(IBurpExtender, IProxyListener, ISessionHandlingAction):
 6    def registerExtenderCallbacks(self, callbacks):
 7        self._callbacks = callbacks
 8        self._helpers = callbacks.getHelpers()
 9        callbacks.setExtensionName("Authorization Bearer Detector and Replacer")
10        callbacks.registerProxyListener(self)
11        callbacks.registerSessionHandlingAction(self)
12        self.previous_token = None
13        print("Authorization Bearer Detector and Replacer extension loaded.")
14
15    def processProxyMessage(self, messageIsRequest, message):
16        if messageIsRequest:
17            http_service = message.getMessageInfo().getHttpService()
18            url = URL(http_service.getProtocol(), http_service.getHost(), http_service.getPort(), "")
19            if url.toString().startswith("https://XX.com"):
20                request = message.getMessageInfo().getRequest()
21                headers = self._helpers.analyzeRequest(request).getHeaders()
22                for header in headers:
23                    if header.startswith("Authorization: Bearer"):
24                        token = header.split(" ")[2]
25                        if self.previous_token != token:
26                            print("New Authorization Bearer found in a request to " + url.toString() + ": " + token)
27                            self.previous_token = token
28                            self.replaceToken(message.getMessageInfo())
29
30    def replaceToken(self, messageInfo):
31        request = messageInfo.getRequest()
32        requestInfo = self._helpers.analyzeRequest(request)
33        headers = requestInfo.getHeaders()
34        newHeaders = []
35        for header in headers:
36            if header.startswith("Authorization: Bearer"):
37                newHeader = "Authorization: Bearer " + self.previous_token
38                newHeaders.append(newHeader)
39            else:
40                newHeaders.append(header)
41        newRequest = self._helpers.buildHttpMessage(newHeaders, request[requestInfo.getBodyOffset():])
42        messageInfo.setRequest(newRequest)
43
44    def getActionName(self):
45        return "Replace Authorization Bearer Token"
46
47    def performAction(self, currentRequest, macroItems):
48        self.replaceToken(currentRequest)
49        return None
Authorization headerConfiguring an upstream proxy in Burp Suite #
Proxy chaining #
Some web applications require traffic to be routed through a predefined proxy. In such scenarios, configuring our browser with the predefined proxy for the destination web server will prevent intercepting traffic with Burp Suite. To solve this issue, Burp Suite allows the configuration of an upstream proxy, enabling you to intercept traffic with Burp and forward it to the proxy used to access the web application.
Upstream proxies are also useful when using several web application testing tools. For example, Burp Suite can be chained with Zed Attack Proxy (ZAP) or a custom automation script built upon mitmproxy. Chaining proxies allows us to leverage the strengths of each tool simultaneously during testing.
Configuration in Burp Suite #
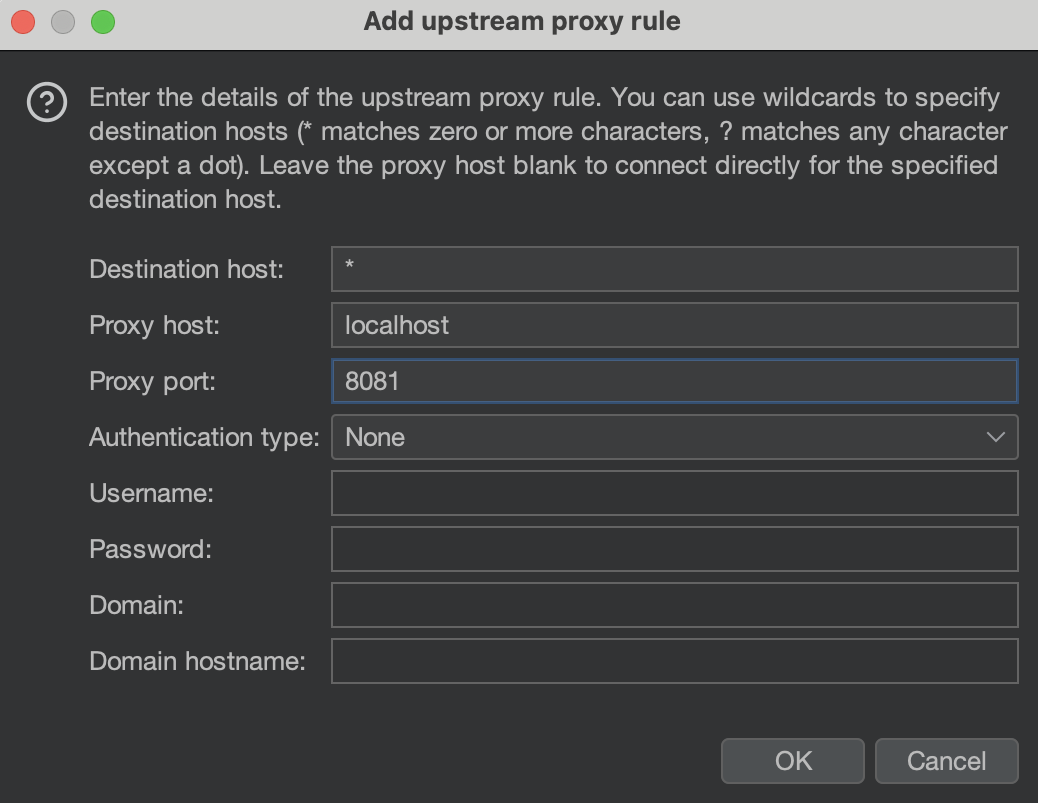
To configure an upstream proxy, go to Settings > Network > Connections and scroll down to the Upstream proxy servers section. Click Add to configure a new upstream proxy. In the pop-up window, specify the destination host, the proxy host or IP address, and the proxy port. If the proxy requires authentication, further specify authentication-relevant information such as the authentication type, username, and password.
Proxying Burp through ZAP #
In the following example, Burp is proxied through ZAP. Burp listens on localhost:8080, while ZAP listens on localhost:8081.
Burp is configured with ZAP as an upstream proxy. In the configuration below, traffic to all hosts is proxied to ZAP:
In Burp Suite’s built-in browser, opening trailofbits.com appears as follows:

Note the new elements on the sides of the browser. ZAP injects these elements into the page to provide a heads-up display (HUD).
Looking into Burp Suite’s HTTP history, we also find the corresponding requests to trailofbits.com.
Proxying Docker traffic through Burp Suite #
Proxying Docker traffic through Burp Suite can be a challenge because Docker applications are typically running in an isolated container network and Burp is running on the host. This section will show you how to proxy a Docker container’s traffic through Burp running on the host machine.
First, a note on Docker environments. This section assumes you’re using either
Docker for Mac or
Docker for Windows, and thus have access to
host.docker.internal by default. If you’re running Docker in a Linux environment, then you can use --net=host and localhost, 172.17.0.1 with the default bridge network, or see this StackOverflow question for more information:
What is the Linux equivalent of “host.docker.internal”?. With that out of the way, we will be using host.docker.internal for the rest of this section.
To proxy Docker container traffic through Burp we will need to export Burp’s CA certificate.
Their documentation provides a great guide on how to do that. We will assume you exported your Burp CA certificate to ~/Downloads/burp.pkcs12. When exporting a certificate and private key pair Burp will use the PKCS#12 format. Most applications will expect a PEM-formatted CA bundle. Let’s convert our PKCS#12 CA bundle to PEM formatting:
openssl pkcs12 -in ~/Downloads/burp.pkcs12 -nodes -out ~/Downloads/burp.pem
Next we can use the PEM-formatted CA bundle and curl to test Burp’s proxying. Run the following command then check the Burp Proxy tab’s HTTP history tab for the request:
docker run \
    --volume ~/Downloads/burp.pem:/tmp/burp.pem \
    curlimages/curl:latest \
    --proxy host.docker.internal:8080 \
    --cacert /tmp/burp.pem \
    https://www.google.com
Remember, host.docker.internal is Docker Desktop’s special domain for referencing the host machine, and 8080 is Burp’s default proxy listener port. Here we’ve shown how to proxy a basic curl Docker image’s traffic through Burp. Another common scenario we run into is Go applications. Let’s try an example of that.
We will use the following Go code named as req.go to test HTTP requests:
package main

import (
    "io/ioutil"
    "log"
    "net/http"
)

func main() {
    resp, err := http.Get("https://www.google.com")
    if err != nil {
        log.Fatalln("Unable to get response from server:", err)
    }
    defer resp.Body.Close()

    body, err := ioutil.ReadAll(resp.Body)
    if err != nil {
        log.Fatalln("Unable to read response body:", err)
    }

    log.Println("Response from Google:", string(body))
}
Run the script with the following command:
docker run \
    --volume $(pwd)/req.go:/go/req.go \
    golang:latest go run req.go
If you run the following command you should receive a HTTPS verification error:
docker run \
    --env HTTPS_PROXY=host.docker.internal:8080 \
    --volume $(pwd)/req.go:/go/req.go \
    golang:latest go run req.go
2024/06/24 14:06:02 Unable to get response from server: Get "https://www.google.com": tls: failed to verify certificate: x509: certificate signed by unknown authority
exit status 1
We can fix the error by passing the Burp CA bundle like we did above:
docker run \
    --env SSL_CERT_DIR=/usr/local/share/ca-certificates \
    --volume ~/Downloads/burp.pem:/usr/local/share/ca-certificates/burp.pem \
    --env HTTPS_PROXY=host.docker.internal:8080 \
    --volume $(pwd)/req.go:/go/req.go \
    golang:latest go run req.go
This uses the SSL_CERT_DIR environment variable provided by
crypto/x509 to specify a custom CA bundle. You should now see a request in the Burp HTTP history tab with a header similar to User-Agent: Go-http-client/2.0. Note that, when proxying requests for Go binaries using HTTP(S)_PROXY, if the request’s host is localhost, then
proxying won’t work. The simplest way to remediate this is to
set a different hostname in /etc/hosts and use that instead.
Proxying additional programming languages and application runtimes may require different environmental configuration. For example, the
REQUESTS_CA_BUNDLE environment variable for the Python requests library. Investigate your Docker application’s tech stack to better understand how to proxy its traffic through Burp.