Burp Repeater #
Burp Repeater allows you to manually manipulate and modify HTTP requests and analyze their responses. Similar to Burp Intruder, there is no golden recipe for successfully finding bugs when using Burp Repeater—it depends on the target and an operator’s skill in identifying web app vulnerabilities.
Use #
Before proceeding, get familiar with the Reissue request with Burp Repeater chapter in the official documentation.
Set up a keyboard shortcut to issue requests
To streamline the testing process, Burp Suite allows you to set up a keyboard shortcut for issuing requests in Burp Repeater. This minimizes the need to manually click the Send button each time, making testing more efficient and reducing repetitive actions. Assign the Issue Repeater request to Ctrl+R in Hotkey settings.
Sending requests to Burp Scanner #
When you interact with your application, make a habit of sending requests to Burp Scanner. Even if it’s a small change in your request, sending it to Burp Scanner increases the chances of identifying a bug.
To send a request to Burp Scanner from Burp Repeater, follow these steps:
- Right-click on the request.
- From the context menu that appears, select the Scan option.
- Choose Audit coverage - maximum to conduct the most comprehensive scan possible (for more information, see Built-in configurations).
- Click on OK.
You can set up a hot key for an active scan of the opened request. However, Burp Scanner will use its default configuration to audit the request (contrary to the Audit coverage - maximum setup when manually clicking). Assign the Do active scan in Hotkey settings.
The active Burp Scanner will then automatically analyze the request, probing for potential vulnerabilities and security issues.
Remember to look in underlying logs when you send a request to Burp Scanner. Learn more in the Ensure your app handling works correctly section.
Useful extensions #
When sending requests in Burp Repeater, we advise you to use the following extensions:
- Taborator will allow you to use
$collabplzin Burp Repeater. The$collabplzplaceholder will be replaced with a Burp Collaborator payload. You will notice in the Taborator tab whether Burp Collaborator identifies any connections. - Hackvertor is a tag-based conversion extension
that supports various escapes and encodings.
For example, you can conveniently use
<@base64>AAA<@/base64>to Base64-encode input when sending it in Burp Repeater.
Auto-scroll #
When you manually try to bypass server-side sanitization, use Auto-scroll to match when text changes and add custom text both in your payload and in the search form:

test1337 placeholder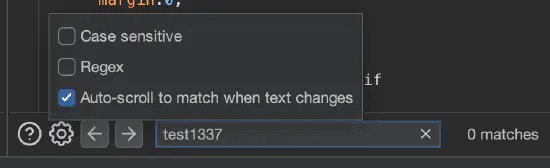
test1337 placeholder appears in a responseThis way, whenever you tinker with a specific payload (e.g., trying different special characters), you will be immediately scrolled to where the payload is reflected in the response.
Show response in the browser #
When you edit and send requests, you may want to see the output in the real browser (remember that the engine that displays an HTTP response in the Render tab is limited). Also, to obtain the desired results, copying a URL and pasting it in the browser is usually not enough. Copying the request to the intercepted request is not convenient either. What’s more, sometimes a response appears only once or is hard to reproduce.
To show the response in the browser, right-click on the specific response, select Show response in browser, and paste the produced URL in the browser that is proxied through Burp. The original documentation states the following:
When you select this option, Burp gives you a unique URL that you can paste into Burp’s browser, to render the response. The resulting browser request is served by Burp with the exact response that you selected (the request is not forwarded to the original web server), and yet the response is processed by the browser in the context of the originally requested URL. This means that relative links within the response are handled properly by the browser. As a result, the browser may make additional requests in the course of rendering the response, for images or CSS, for example. These are handled by Burp in the usual way.
Generating a CSRF PoC #
Cross-site request forgery (CSRF) is a web security vulnerability that allows an attacker to induce users to perform actions on their behalf without their consent or knowledge. This attack relies on a site’s trust in a user’s browser and can lead to potential unauthorized changes such as passwords. Ensure you are familiar with CSRF attacks.
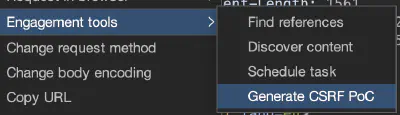
To confirm the presence of a CSRF vulnerability, Burp Suite includes functionality to automatically generate a proof of concept (PoC) for a CSRF attack. To automatically generate HTML for a CSRF attack PoC in Burp, right-click on the specific request, then choose Engagement tools > Generate CSRF PoC:
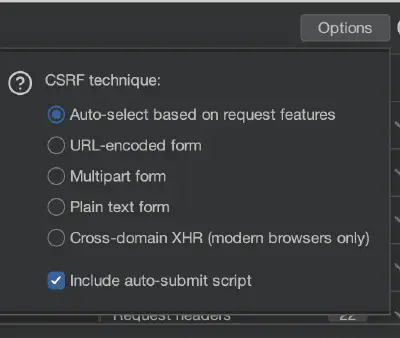
Burp will try to automatically adjust the exploitation technique for the request; however, sometimes you may need to select the technique manually by clicking the Options button in the CSRF PoC generator:
Once the CSRF PoC HTML is generated, you can copy it to a file and open it in a browser. Additionally, you can use the Test in browser button to use a unique link to conveniently open the PoC HTML. This way, you can demonstrate the impact of the CSRF vulnerability: if you can perform the same action executing the original request with the generated CSRF PoC, you’ve probably identified a CSRF vulnerability.
Burp Repeater has its configuration too #
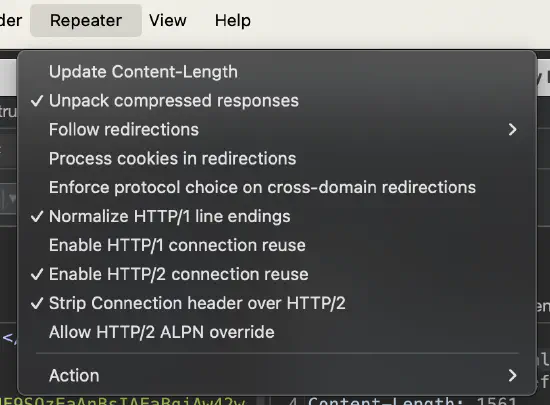
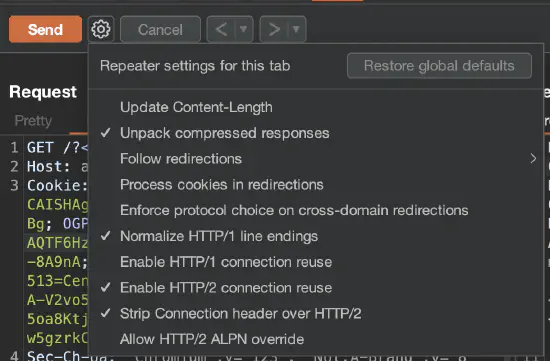
It’s also possible to configure Burp Repeater. Specific options are crucial in more sophisticated attacks such as the following:
There are two levels of Burp Repeater configurations: a global configuration that is applied to all Burp Repeater tabs by default (figure 5) and a local configuration for each individual tab (figure 6) that can override the global settings if you need to do something different in that scenario.
Useful extensions in Burp Repeater #
You can run a specific extension when you work on a specific request. Right-click on the request, then select Extensions, and choose the specific one, such as one of the following:
- Param Miner (the guess everything option) is designed to discover hidden parameters and headers and could reveal hidden functionality.
- HTTP Request Smuggler (the Launch all scans option) launches HTTP request smuggling attacks.
- 403 Bypasser launches permutations of requests to identify authorization issues.
- Server-Side Prototype Pollution Scanner tries to identify server-side prototype pollution issues in Node applications.
In the Logger tab, you can observe how the above extensions work (i.e., requests sent to the server).
Various Burp Repeater tips #
Non-printable characters #
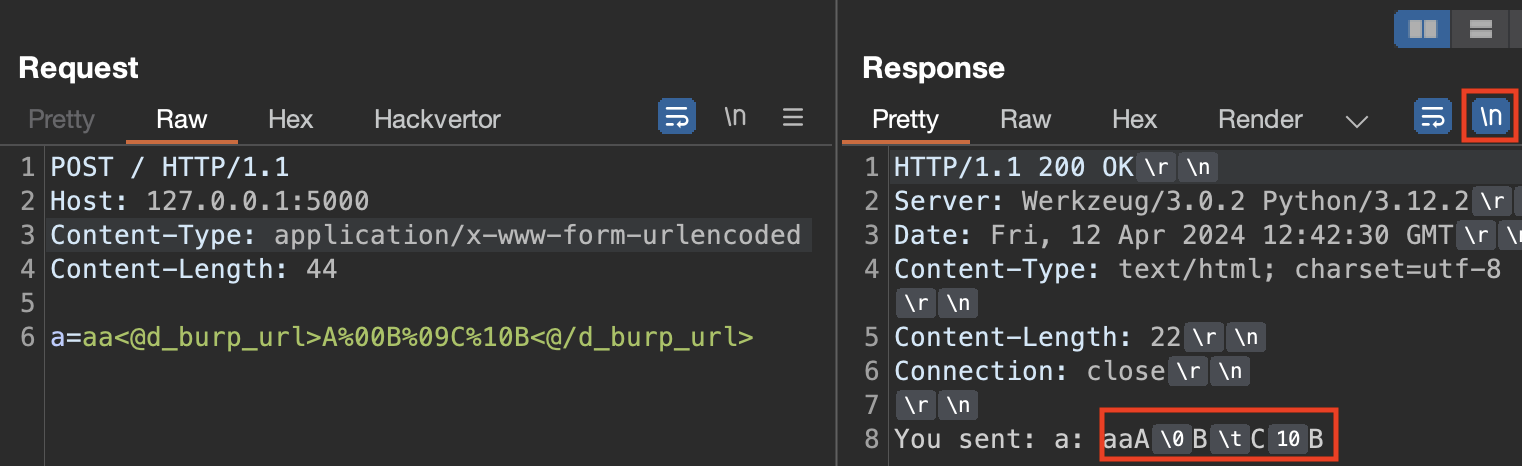
Burp Repeater can show non-printable characters, which can be beneficial when exploiting specific issues (e.g., bypassing WAFs). You can turn it on using the \n button.
The following is an example of an HTTP request that uses the Hackvertor extension to send non-printable characters and the response that shows them in a printable way:
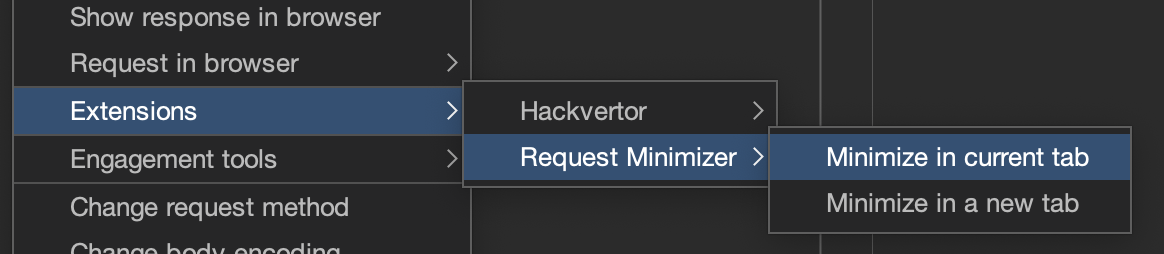
Minimize requests #
Use Request Minimizer to perform HTTP request minimization. The extension removes unnecessary headers or parameters. As each item is removed, the extension will retry the request to ensure the response matches the original request.

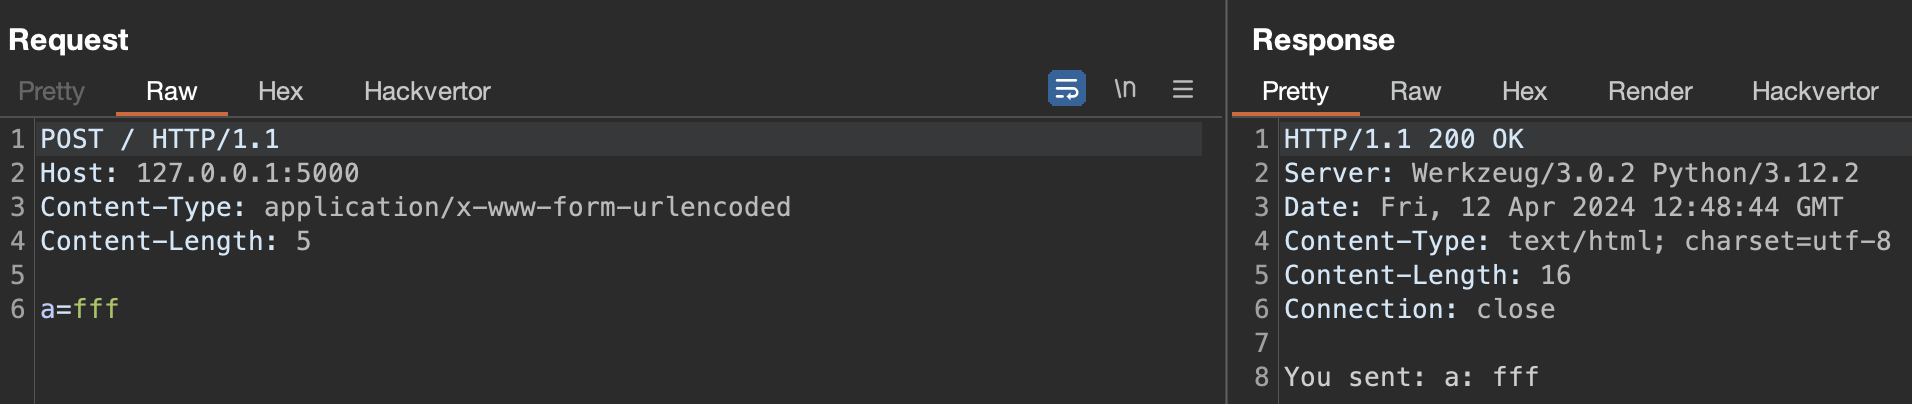
Use this extension to minimize HTTP requests before including them in your audit report. This will improve the reporting readability.
Use Content Type Converter #
The Content Type Converter extension allows you to convert data submitted in a request between the following:
- JSON to XML
- XML to JSON
- Body parameters to JSON
- Body parameters to XML
Example: if you have an original request that submits data using JSON, try converting the data to XML to see if the application accepts data in XML form. If it does, try to identify XML-related vulnerabilities (such as XXE).
